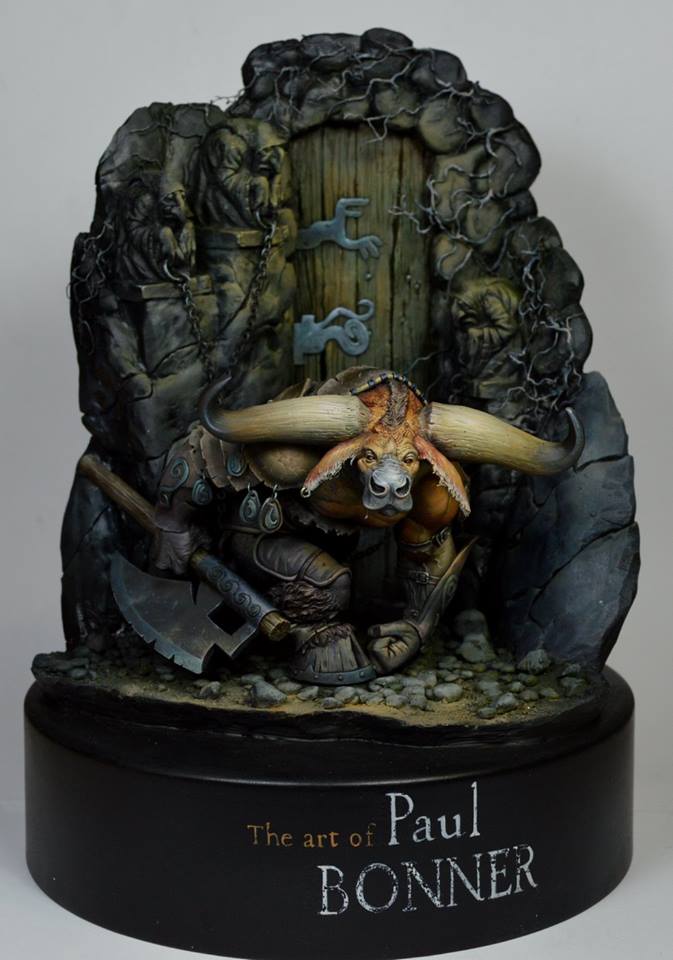
This is a project I did with Joaquin Palacios. He sculpted this amazing model of a minotaur based on the original illustration by Paul Bonner. We worked on it for a long time, maybe not that much executing than actually thinking about it. I think this is one of the most complex exercises that I have ever done, not for being original but for studying Bonner’s style in 2D and trying to bring it to a 3D. I am very happy with the result and hope that the explanations I wrote about the painting of the minotaur are useful to understand the ‘making of’. These first pictures are not the best but they are the only ones I have. This is an article that I wrote in 2015 for my facebook page and I believe it was missed by many people so I now want to bring it back. I hope you find it useful!
- After a base coat in Citadel black primer, I used Dark Flesh from Vallejo to highlight all the light areas. This was very subtle at the beginning because I knew there would be a lot of dark areas as depicted by the original illustration. After that, I started playing with many colours, mostly desaturated. All the brushstrokes were intended as glazes, layered over the previous work.

- As you can see this is a sketch, something a bit shy at first. I have to admit that I was not sure about how to approach the process. I realized that I had to invest a lot more time thinking about the project than what I already did. I analyzed the image for a while and tried to paint the figure in my head. This is advice that Raul Garcia Latorre gave me in the past, and as usual, he was right.


- This picture looks like I’m slowly getting definition in this part, playing with contrasting color intensity. A gray tone slowly transformed into purer colours; ochres and oranges. I don’t remember the colours exactly, I really had to use many so that I could get the tone I wanted. In the shadows I added purple to generate an environmental contrast yet complementary to orange lights.
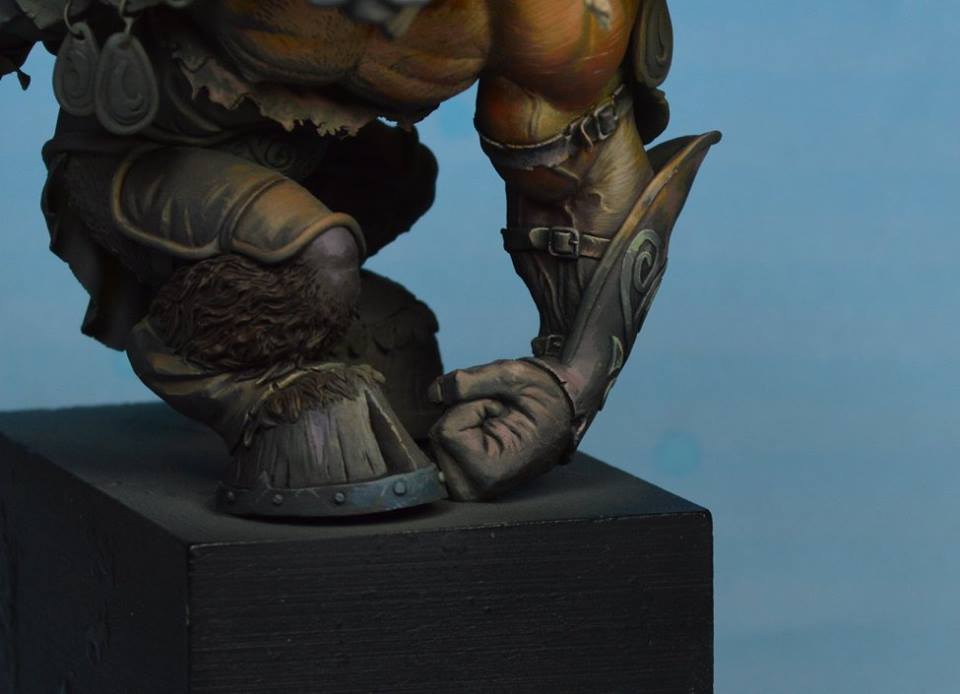
- This picture shows when I encountered the first problem: the paint was becoming satin. During the time I was studying the original artwork of Paul Bonner, I thought that even though it would help me to add more contrast, I should avoid gloss in general. The objective was not to leave everything a bit pastel or matte, but I knew I wanted to maintain control of light and shadow, somehow like a drawing. When painting a scratchbuilt piece, especially if the model was made with Sculpey or Fimo, oils used to achieve smoothness can make the acrilyc paints satin. At this point I had two options to solve this: airbrushing with Vallejo and brush working with Scale Color. This is a resourse that I usually benefit from when I’m in this kind of situations.


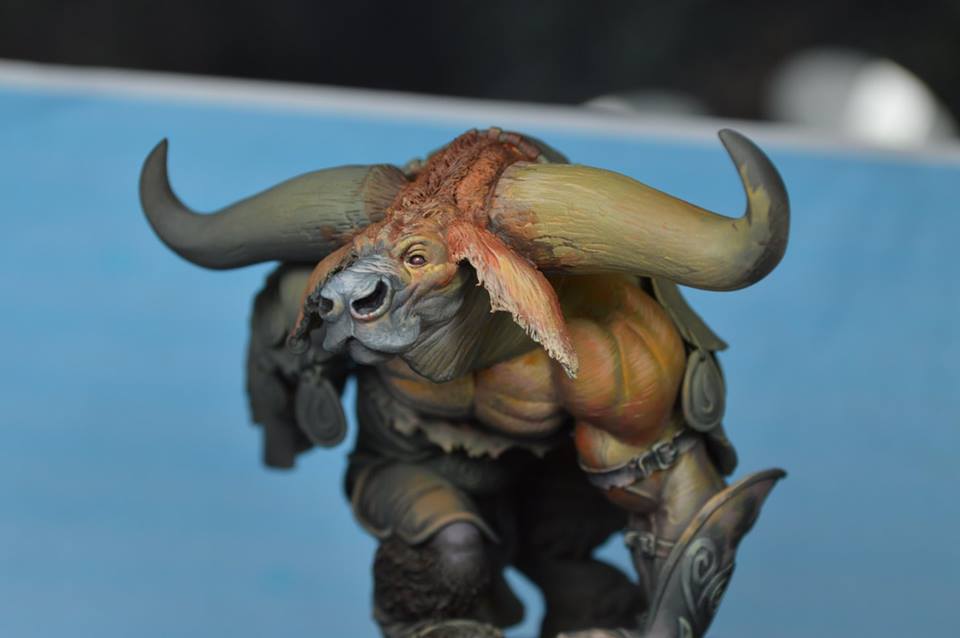
- In this picture you can see a significant jump in the painting process. Although I have no pictures of the work in between, I would like to explain a little the following steps in these images.

- At this point, the right part of the model (in the picture) has gained definition and intensity compared to the left part. In the bottom of the piece and the left arm I applied shades of gray and brown in order to represent the shadows. In the original Paul Bonner’s artwork this appeared quite dark, because volumes represented in illustration are created by using contrasts like these. In a 3D model the volume exists already and all you have to do is accentuate or soften looking for a specific effect.

- The minotaur hair is painted by being loyal to the original sculpture. This is intentional, like the sharper strokes on the ears intended to generate texture on both sides, just like in the original artwork. For this I used shades of orange and reddish brown, and the lights had yellow ochre and orange. At some points I added gray to the mixture to lower the intensity and also flesh colors (like Dark Flesh or Sunny Fleshtone from Vallejo) to be in harmony with the other elements.

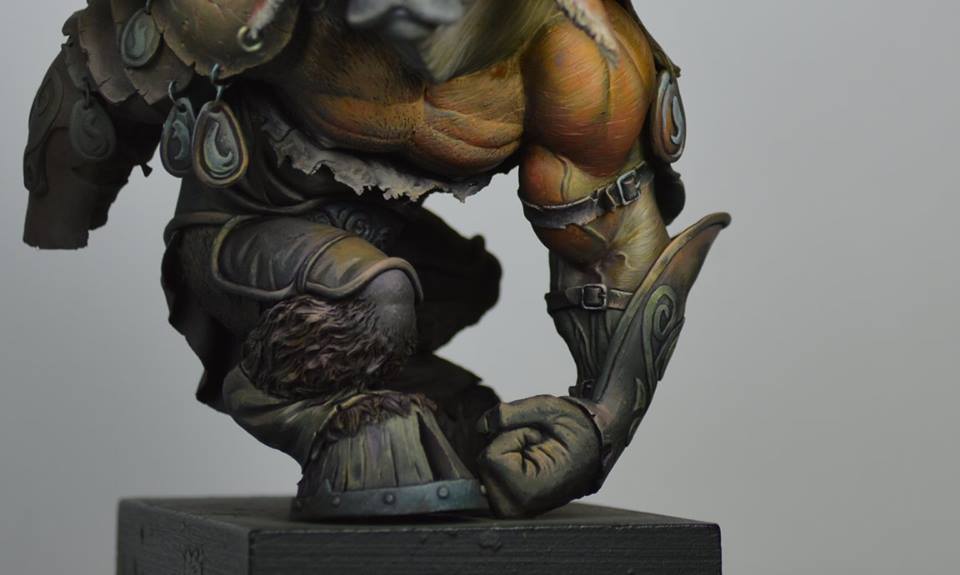
- In this image you can see the work done in the muscles of the figure. Following the reference material, I used a distinctive resource from the author: separating the muscles of the anatomy. At the points of separation between muscles, instead of adding a shadow plane, I drew brighter lights. I personally find it an aesthetic and personal resource, and it is something that I like to use on my works.
Moreover, this can be seen in the forearm armour and in different leather areas. The brushstrokes have a clear intention of representing the effect of the illustration. The result of the painting is in line with the rest, but here you can see the brushstrokes, something that gives personality to the result. In some points I applied thicker paint, while in other cases I applied glazes almost to play with transparencies.

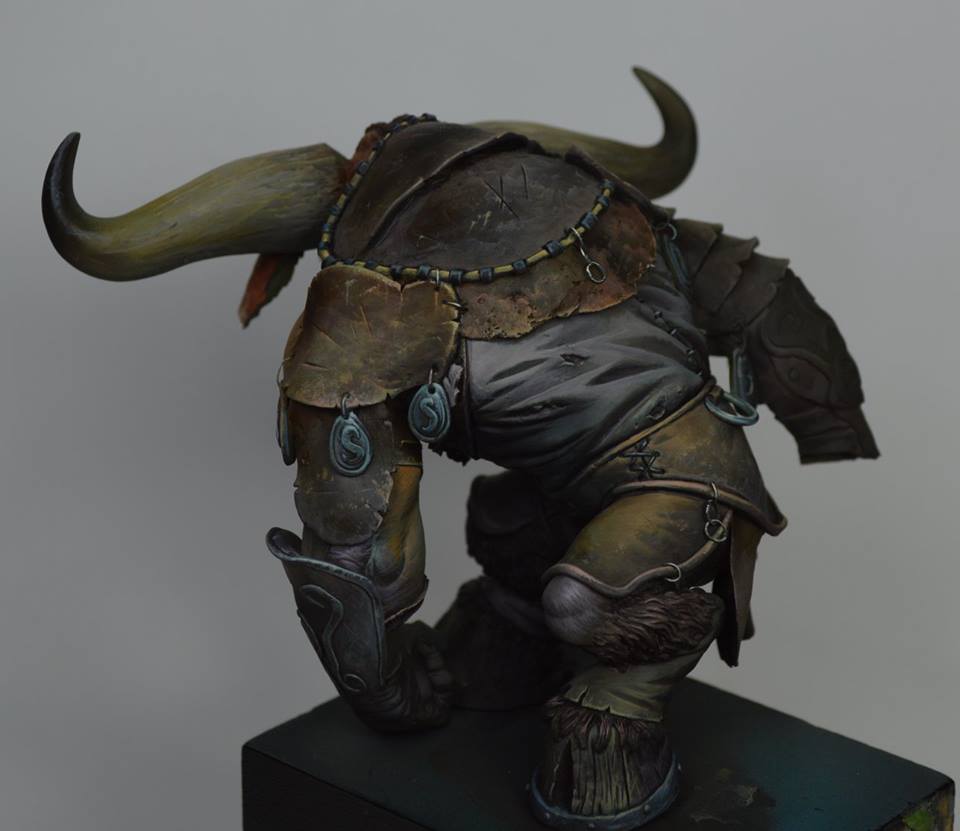
- This is a detail of the back leg, which in the end I will be mostly hidden by the scenery. The audience will not be able to appreciate the back part of the model as you can see in the following images. At this point the work is more interpretative and imaginative since there is only one view of the illustration. Just like Joaquin Palacios did with the sculpture, using the front view and his imagination as inspiration, I would do the same for the paintjob. Again, the different textures are painted according to the material they represent.
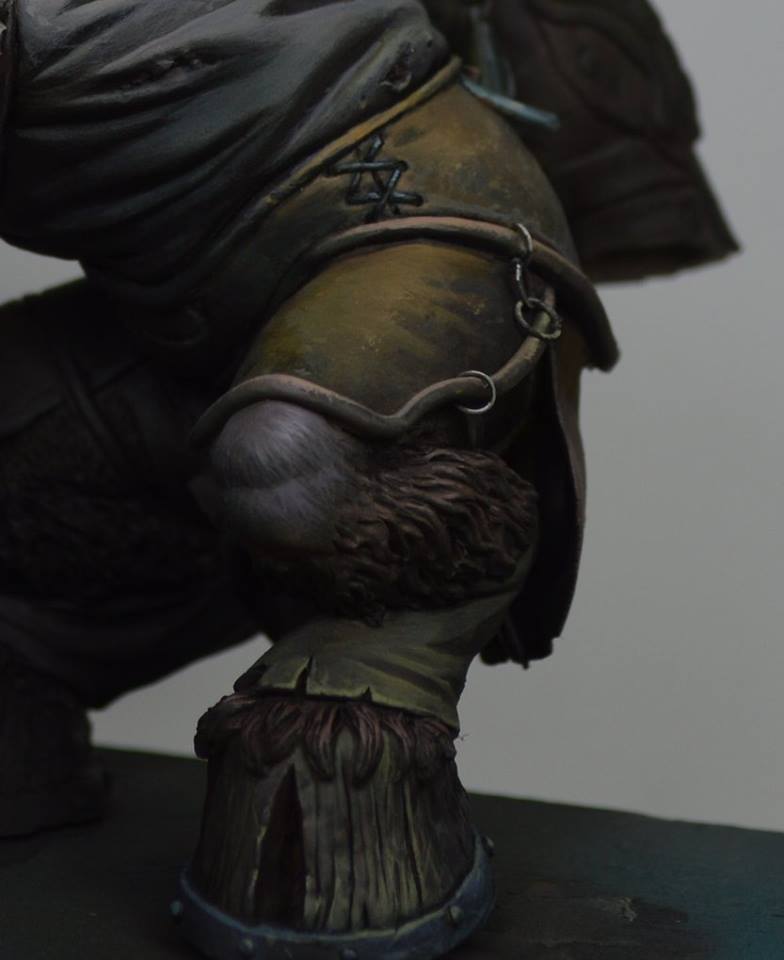
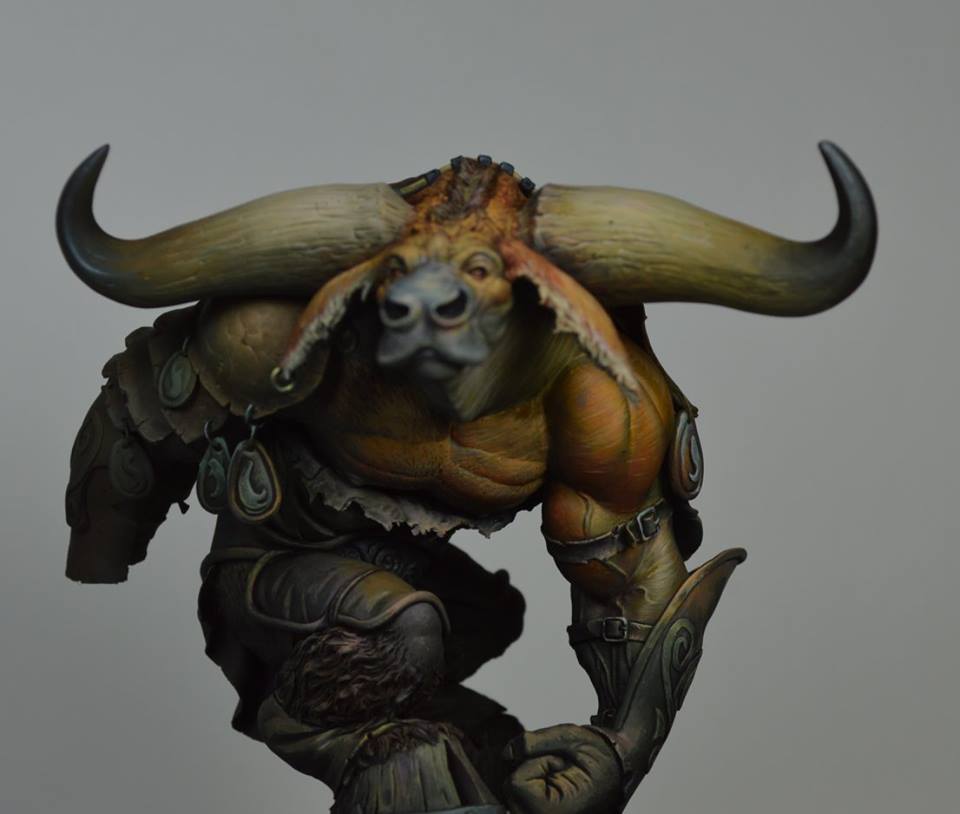



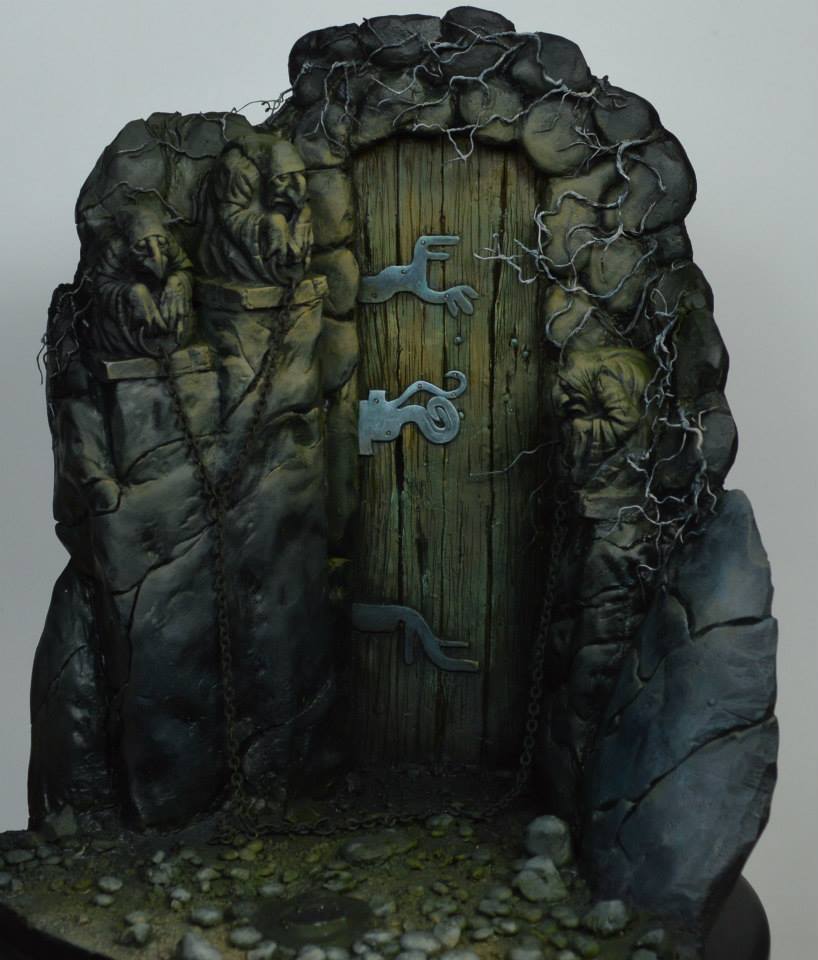
- This is the base of the minotaur and I am happy with how it turned out in the end. In order to get strong contrast, the base was painted in a satin black. This contrasts more with the matt ochre tones in the lighter areas. I tried to use the same light colours in the stone and the door that I used in the miniature to maintain ambiance. I have to say that this was easier than I expected, maybe because the original sculpture was so well detailed that I just had to copy the colours according to volumes. I focused the light behind the minotaur on the top of the door, looking at the dark areas that the miniature would cover. As I did with other parts of the piece, the technique used was more like washes than glazes, and it also has parts where I used a sponge with dry paint or even applied dry brush, just to generate a texture. Judging by the illustration this was a fairly simple way of representing the materials.
Finally, I show you the final pictures of the minotaur. I really hope you enjoyed the painting process. Until next time!





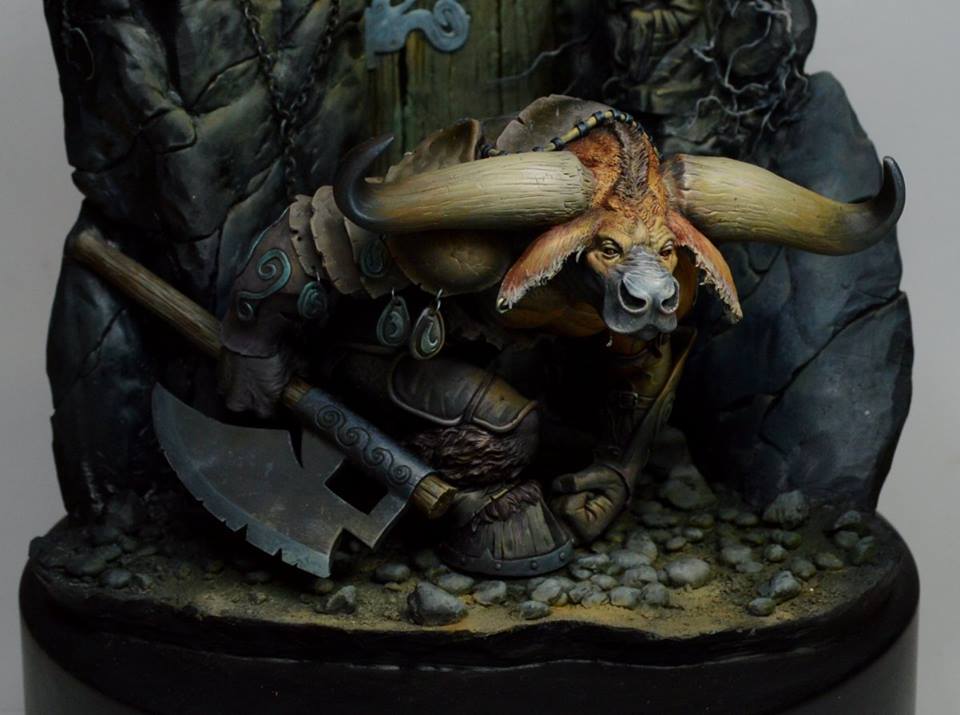
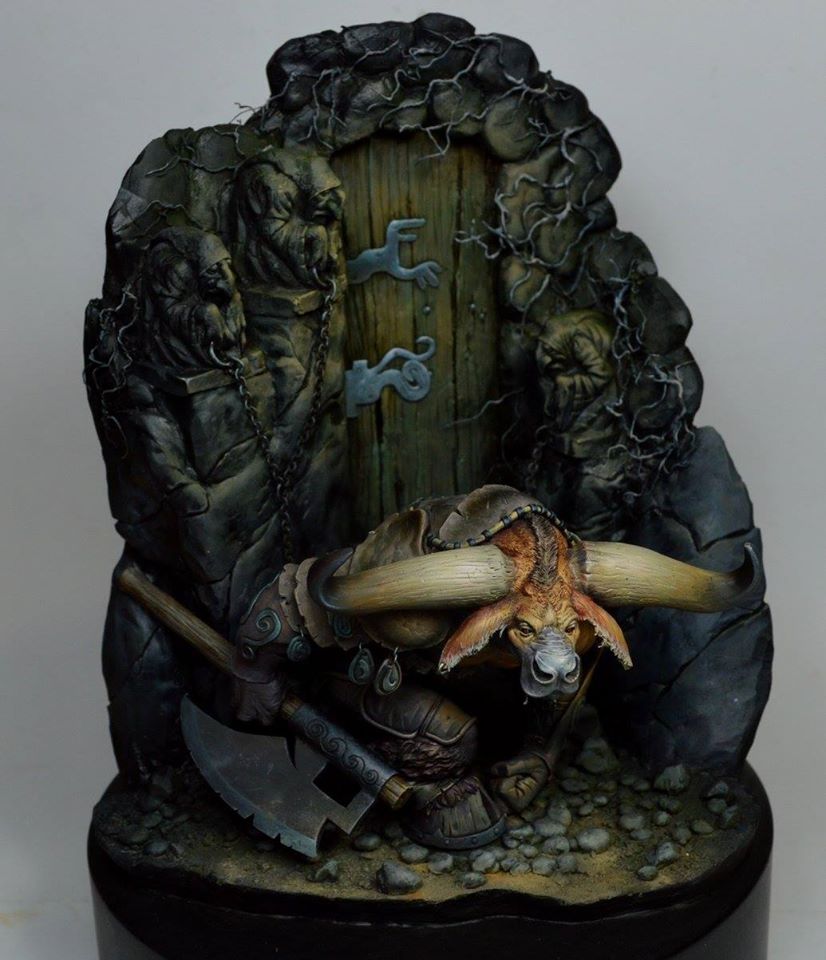


One of my all times favourite. You sir, are a true artist! Thank you for letting us enjoy your fantastic work.
Cheers,
Gino
It is also one of my favourites! Such a great collaboration between Joaquín and Marc.
As Gino said, it’s also one of my favorite piece ever.
It’s so well executed (sculpture and painting) that I though it was the original bonner’s art when I saw it for the first time. Thanks a lot Marc for explaining your process, it’s very interesting.
And of course thanks to Volomir for publishing this article.
Thank you for reading us! And of course Marc again for being so awesome 🙂
Holy moly. This is absolutely incredible. I was looking up Paul’s art, saw the original painting and this next to it and did a double take. Talk about a painting come to life. This is just seriously amazing.