


One of my favourite sculptors of late, and for quite some time now, is Lucas Pina. His work as a sculptor has been improving year after year. He has become one of the most important artists of our miniaturesphere because of the originality, personality and expression of his work. When they offered me the possibility of painting this bust, I was very happy especially because of the subject. The different materials of this piece would also be a challenge to try out new techniques and finishes. So here I present to you this small tutorial on how I painted it!
What I like the most of Lucas Pina‘s miniatures is the ability to draw textures very comfortably. Lucas’ pieces usually have a lot of versatile details. If painters want to, they can polish up to the finest detail; but if the intention is to perform a more effective kind of work, it will work as well.
Even though in this case I did not take photos of the whole process, I think that with the explanation you will be able to follow all the steps of the painting.
‘CAPTAIN GARFIO’ BUST PAINTING TUTORIAL
The start in any case is similar as in other works. Since there are many elements to consider, the best is to outline the overall colour scheme to see how the colours combine. Even so, as you can see in the first photos and the ones following, I performed some changes between the first version and the final colour scheme.
Usually, we make mistakes when we are not entirely sure about how to solve a certain element, or how we are going to deal with the colour scheme of the whole piece. This means we have to go back and start over. Ideally, we should try to keep all of the paint layers applied to the piece sufficiently homogeneous and thin so that we can paint back over them without losing any details.
In this first image we see how I painted the shirt in brown colours, looking for leather textures and a tertiary colour that does not take attention from the beard and the face, the main points of focus of the bust. I realized after some time that I was not on the right path so I decided to start over with a base of cream/white colour.

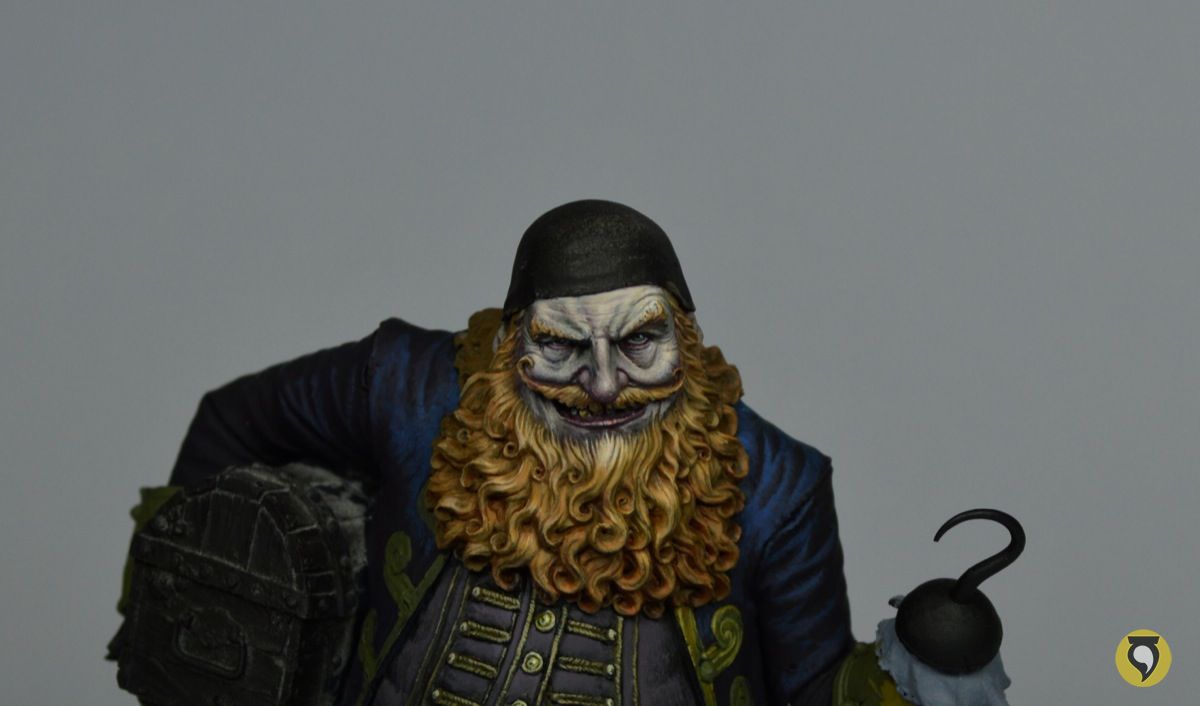
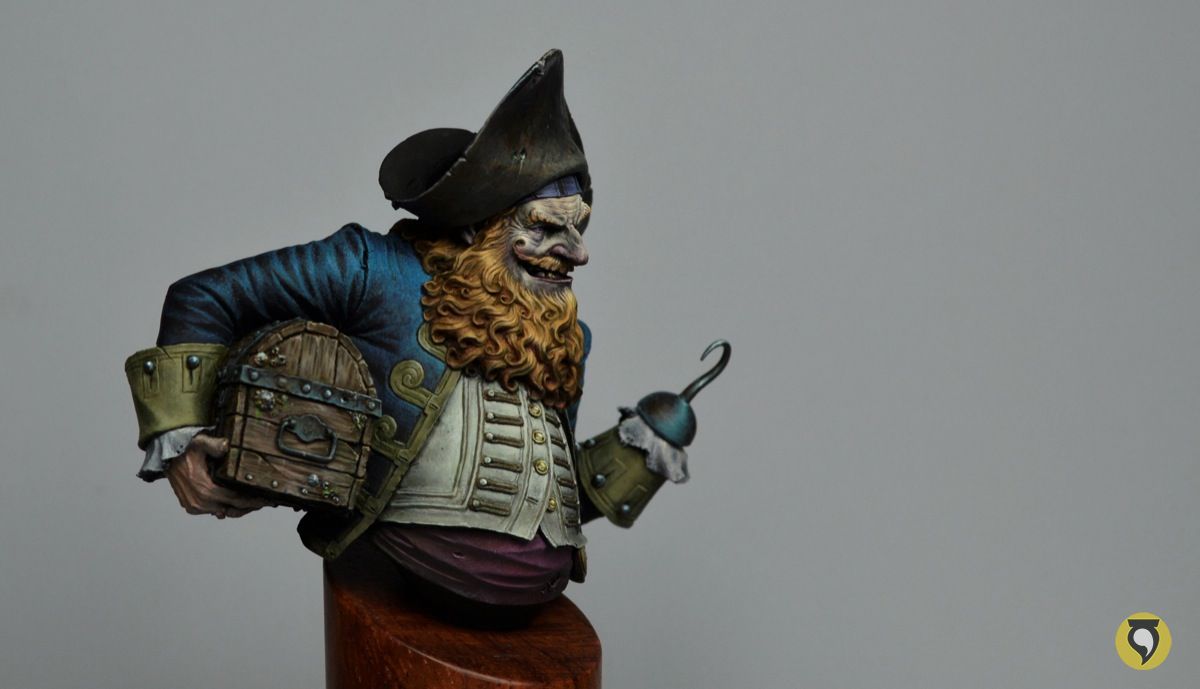
The painting of the beard was for me the most fun part. This kind of volumes are very interesting in all of Lucas’ sculptures. They let you draw textures and polish them very easily. The base is a brown/orange from Scale Color, mixed with Mahagony from Vallejo Model Air. This brown colour, apart from balancing the matte result from the Scale Color paintjob, was the colour that I used to balance the ambience of the piece, and in every mix I used there is a little portion of that paint.
For the highlights I added Clear Orange from Vallejo Model Color and different skin tones to control intensity. Once the hairs are drawn and defined, as you can see in the picture, I applied a series of shadows and edge highlights with this Vallejo Model Color brown tone. I also applied brown and violet inks, in the deepest areas.
The blue jacket was where I worked longer of the whole piece. I was not entirely sure of the process to follow. Therefore, I struggled to achieve an acceptable result, but in the end it was all worth it. My intention was to work out all the volume by stippling. I sketched the wrinkles with thicker dots and then defined the planes. I did this by overlapping them with other lighter dots and also other darker ones to make the surface more uniform.
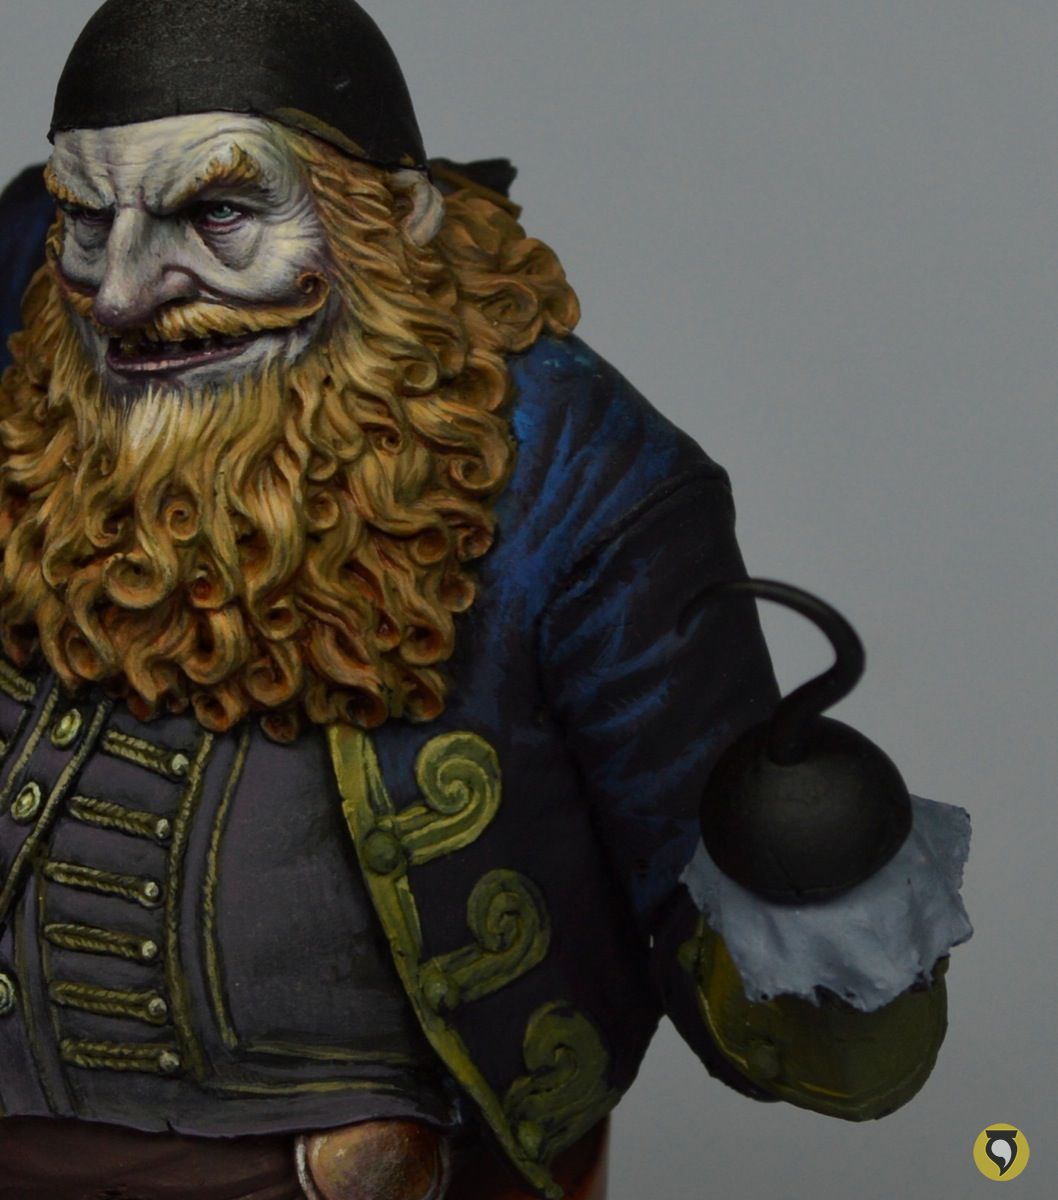
For the face, I looked for a pale skintone showing the effects of hard life and ageing. In the next picture, you can see how the different elements of the main plane are defined. The only remaining thing is the hat. You can see how the brushstrokes are tougher, and they serve to give direction to the tones of black. For the black colour, the idea was to add a bit of the rest of the colours used in the bust. In it you can distinguish hues of blue, red, cream, ocres, etc. In the following steps, the work consisted of cleaning and smoothing the texture job.

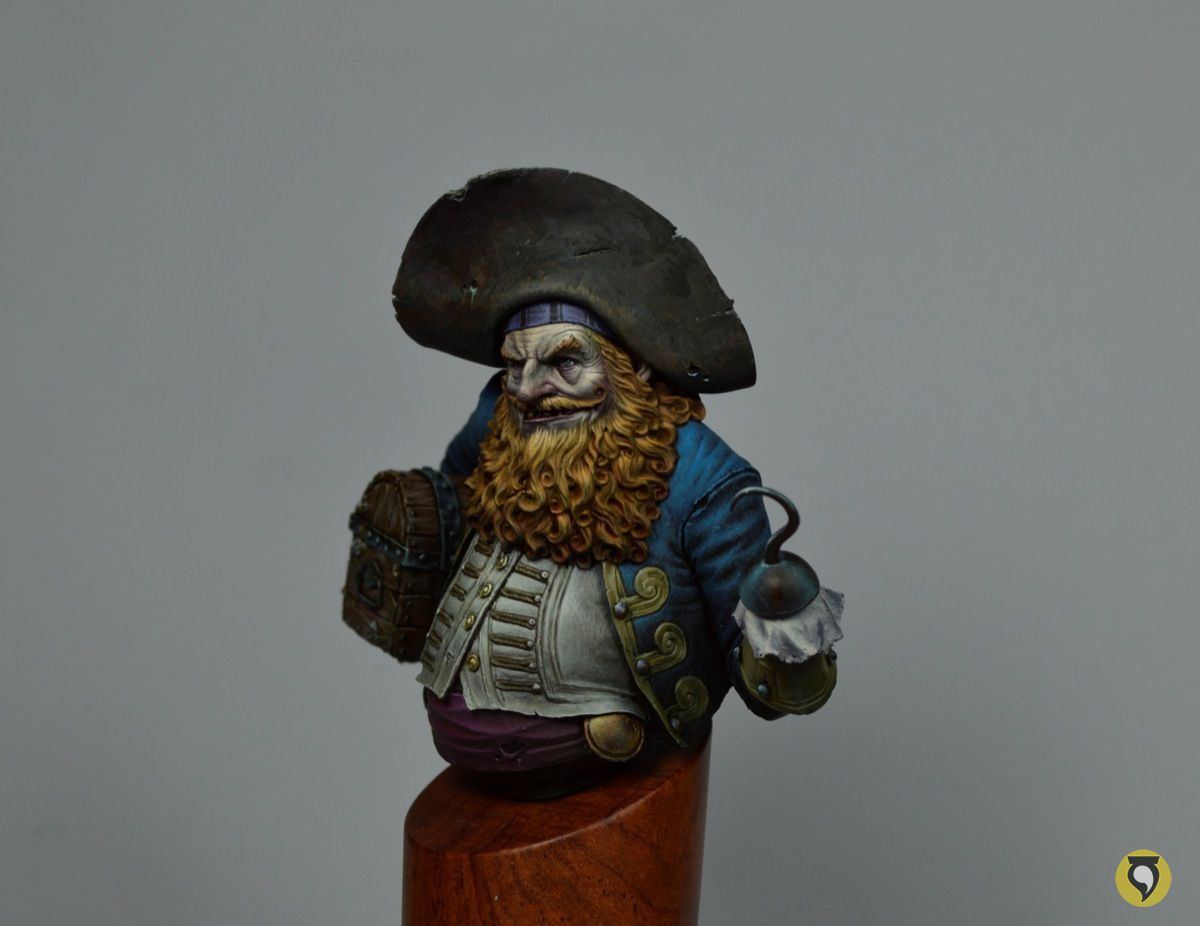
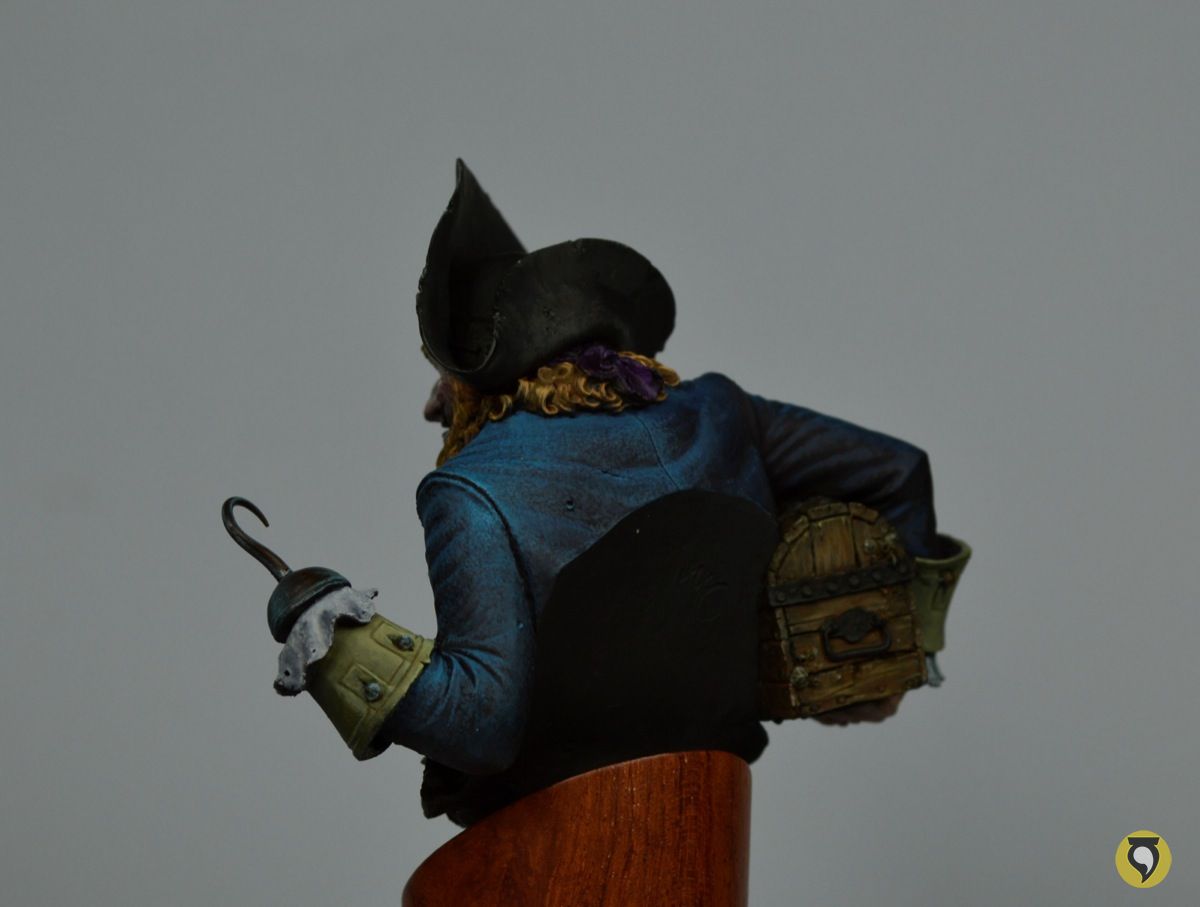
There are no more photos of the intermediate steps in this tutorial. Even so, between this point and the end, the work consisted of finishing and polishing the elements. I worked on the contrast in light and shadow (internal edge hightlighting in shadow and specific light spots).
The next photos are previous to the final result. Here you can see the differences between the piece before the end, and once everything is finished.
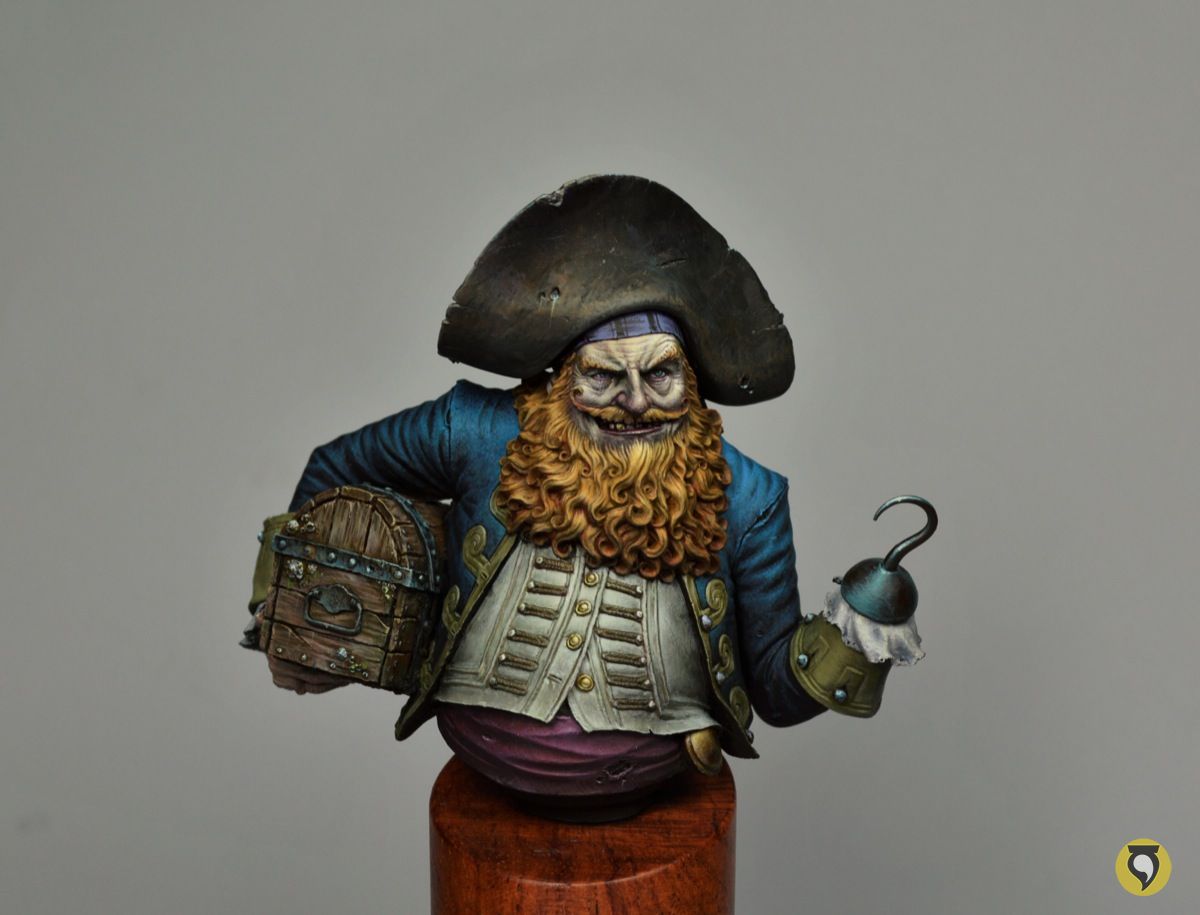
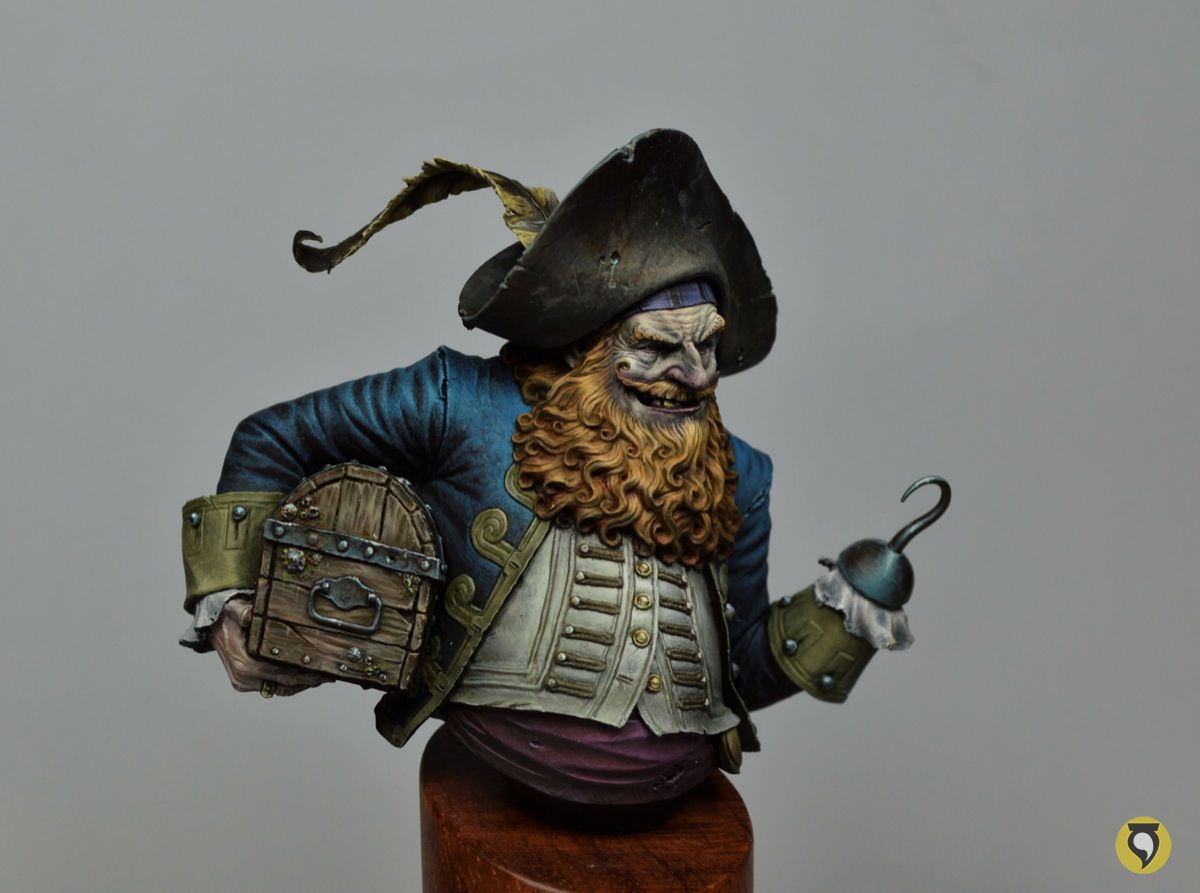
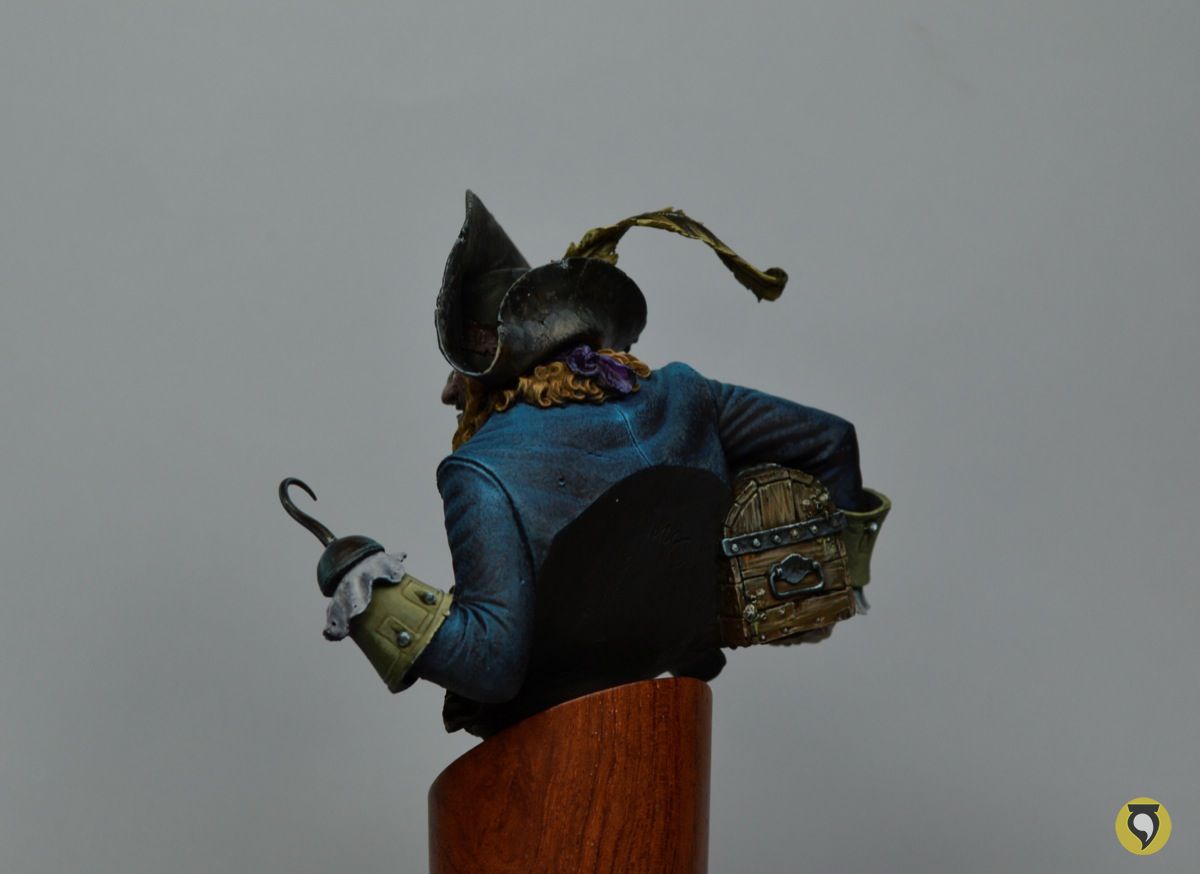
FINAL PICTURES
Despite being subtle, I think that, in order to explain this concept of ‘finishes’, it is very interesting to observe the weaknesses that the paintjob has between one step and the next one. For some painters it might be tough to see if something is already correct or if it could be better, and how to perform this step. Sometimes it is just a matter of applying subtle touches like the ones we already mentioned. I hope that you can appreciate them in these last photos of the tutorial.


As always, many thanks for reading this tutorial! I hope this has been useful and interesting to all painters who would like to try their skills with this bust. Enjoy your painting!


 unveiled in Taiwan")