After a long time without uploading a painting process, this week I bring you the latest model that I have painted for FeR Miniatures.
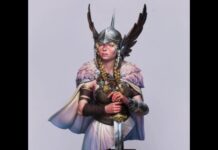
The figure is a 1/10 bust elegantly modeled by Eduard Pérez. It is the first time I have painted one of his pieces and I have to say that the experience has been especially pleasant. The finishing of the fabrics and most of the volumes were designed with great attention to detail and have some subtleties that allow fine tuning in areas like the face. The rounded shapes in the clothes require a very careful painting in the transitions, to emphasize the roundness in those areas, so the work was especially laborious.
First of all, given its importance and size, I started painting the face. It’s not what I always do, but in busts like this, the face is so important that it demands so. In a piece with volumetries as subtle as this one, the work is especially laborious in sketching, adjusting and correcting. As an important note, remember that it is always useful to have a darker background for lighter areas as it helps to highlight them. Since the base of primer is lighter, I gave a base layer of bluish black to the hat to help outline the face of the aristocrat. You can see the brushstrokes on both the face and the hat, an interesting trace that as I was attenuating with the continuation of later layers.
Then I outlined all the main elements of the bust and structured a series of lights and shadows more or less accentuated. The overall green is a simple blend of Dark Olive Green, Brown Orange and Black. For the highlights I added successively Ice Yellow and Golden Olive. If it burned the lights, it can be corrected with Olive, golden and dark greens.
As you can see in the photo, the base layer approach in all the elements is the conventional one. Looking for the general scheme in the first steps helps to find coherence and interaction of colours in the model. The unifying colour for the light is Ice Yellow, and for the shadow its Turquoise Green (Golden Air).
The turquoise belt and bow I used a base of Emerald, Blue (Model air) and a pinch of black to which I added Ice Yellow for the strong lights and a bit of Sky Blue.
In the back view, I worked on the feathers with a particularly intense red that contrasted well with the green of the fabric. In the front main view it would have called too much attention to the face, but since they only look behind, the effect works. The mix is simply Vermillion to which I added Ice yellow and the shadows are Red washes (Model Air) and a bit of black.


I went through the process smoothing transitions and integrating lights and shadows using different strokes and also different brushes to achieve the textures. Large brushes allow us to solve large surfaces more cleanly. For a bust of this size, it is convenient to have a #2 or #3 brush at hand to be able to paint those surfaces well. This is mostly to unify the lights we have worked on based on dotted lines and stripes to texturize with smaller brushes.


In this new picture, there is an important step up in definition. The process of smoothing transitions is an exercise of overlapping strokes and glazes that results in the final framework. At this point I worked over the shadow edge highlights on the strips of the jacket, with a mix of black and Indigo Blue (Golden Air). Golden colours are very intense and quite satin, which allow me to generate a greater contrast.


In these last pictures you see how the process simply requires insistence of correction and adjustment that brings us closer to the end. I matched some levels in the face and wrinkles in the fabrics and enhanced the lights and some shadows to achieve greater contrast. These last steps allow me to use a little bit of airbrush as a general glaze to finish unifying the surfaces. Although 95% of my work is usually by brush, the airbrush is a very useful tool for finishes and tone adjustments. Even so, to work on transitions and soften the brushstrokes, I always prefer to do it by hand with the brush.
Here is the final gallery with photos of the finished work. I hope you liked the article and see you soon!











Could you please explain how you go about painting red hair like that? Maybe a step by step guide? Looks very realistic.
Hi Peter! Marc is currently on holiday in the mountains completely disconnected from the world. We’ll try to get ahold of him to see if he can help further. Thanks for your question!
Hi! Sorry for the delay in answering your question. Well the red hair was done with browns and oranges. Something like orange brown from vallejo on the base or red brown. It depends on how red or orange you want to paint the hair. Its important to have some primaries to compense the tone and the saturation. For the darker parts I add some black + red and then a bit of mahogany from model air to make it a bit more shinny. For the lights I added some flesh tone like sunny skintone mixed with orange so I can compense the amount of pure color while adding more light( fleshtone contains a lot of white). About interpretation its important to find the main volumes, like packs of hair and then the more light we can draw some small hairs to represent the texture. But the idea is to paint the general volume ignoring the details of hairs already sculpted. It may help to look for some references to understand better the way that the hair behaves. Hope it helps! Best regards, Marc