


We continue with the Spire of Dawn Christmas in volomir.com, now with the complete tutorial on how to paint the High Elves Sea Guard by Volomir, the first of the units of Volomir’s High Elf army taken back from the old blog.
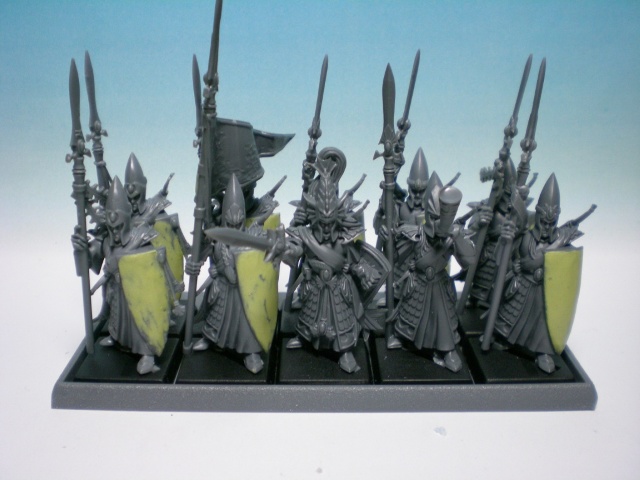
With the release of Warhammer: Island of Blood and the new range of High Elves at the time, I decided to build a little army of these little flower eaters, around the hero that is the elf prince of Tribute to the Fallen. First step was a unit of High Elves Sea Guard from the Island of Blood:

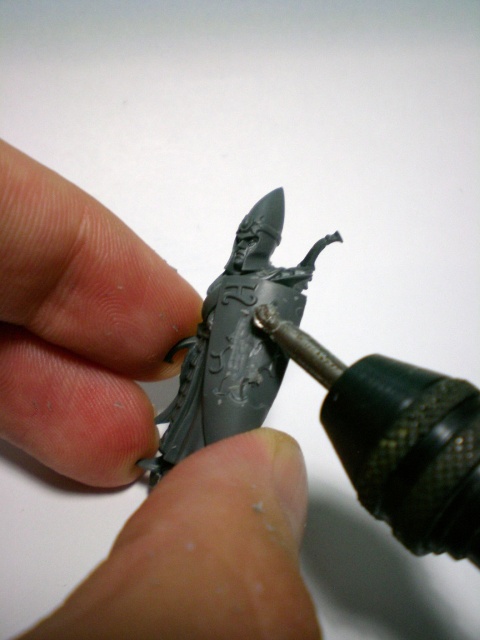
I didn’t really like the seadragon relief on the shields though.

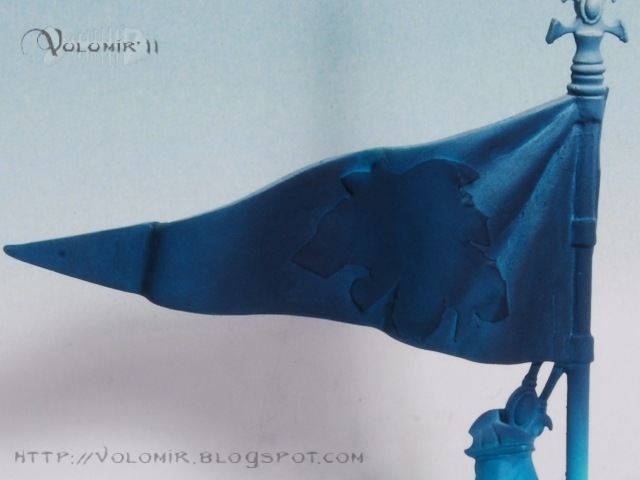
That’s why I got rid of them with the use of a Dremmel. I also erased the reliefs on the banner, as I preferred a freehand design instead of the carved volumes.
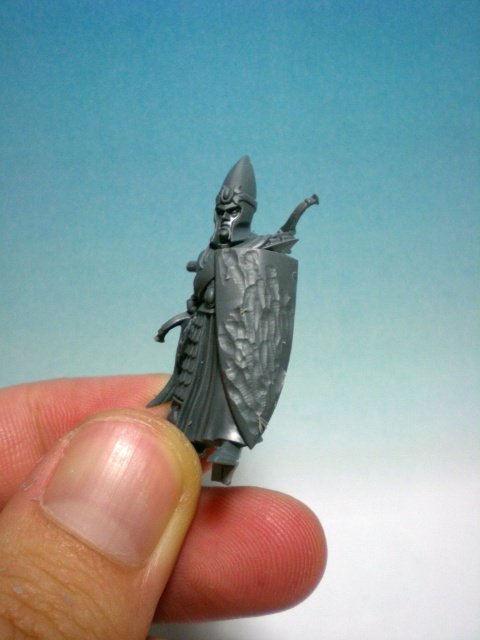
I filled the holes on the shields with some Milliput and sanded them after they are dry to smooth the surface.
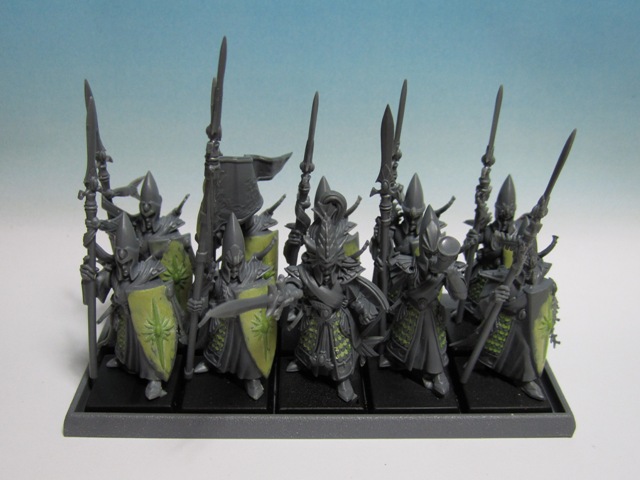
I also didn’t like how big the armour scales were. I believe they could have modelled an additional row of scales between every two of them. So, that’s what I did next.
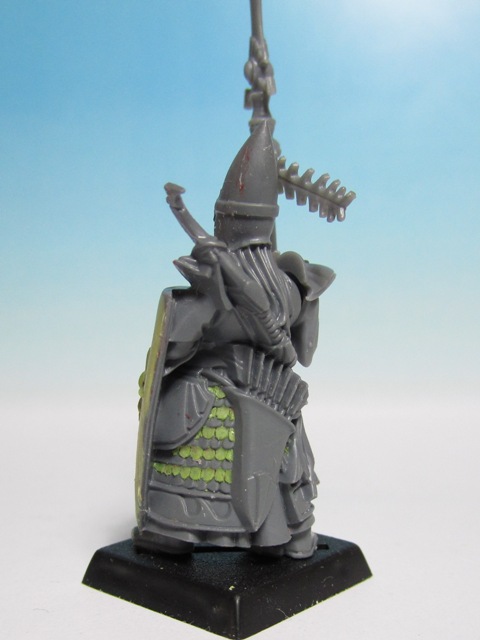
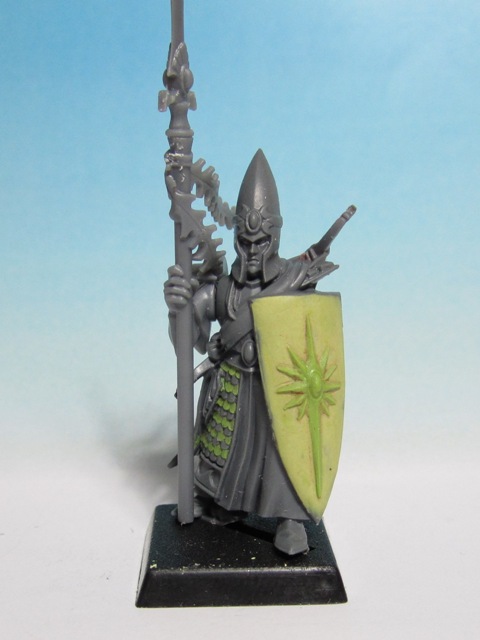
Also, I sculpted some reliefs of my own on the shields. I would prefer to use the plain shields for some complete freehand work, but as this would be an entire unit, reliefs would make work faster. I just modelled one and then made a little green stuff press mould to repeat the relief in the rest of the shields. Now they have a symbol to relate them to my Tribute to the Fallen prince!
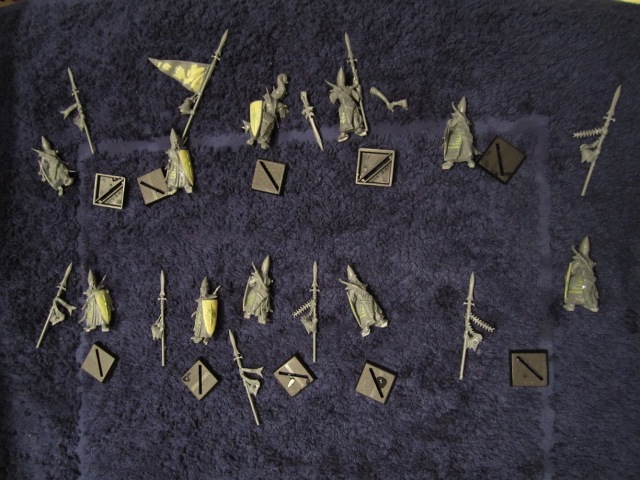
Now that everything is finished, I washed the pieces with some water and soap, to get rid of possible mould grease and putty dust. See them dry on my bath towel!
Now let’s start with the painting. I would be painting one prototype first, in which I would not hesitate to spend a long time. Once I finished this prototype I would have clear knowledge of what I wanted my elves to look like. Clearer choice of colours to use, and faster work with the rest.
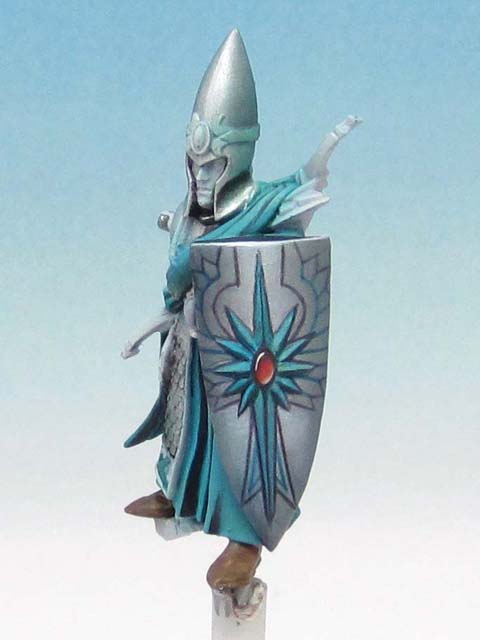
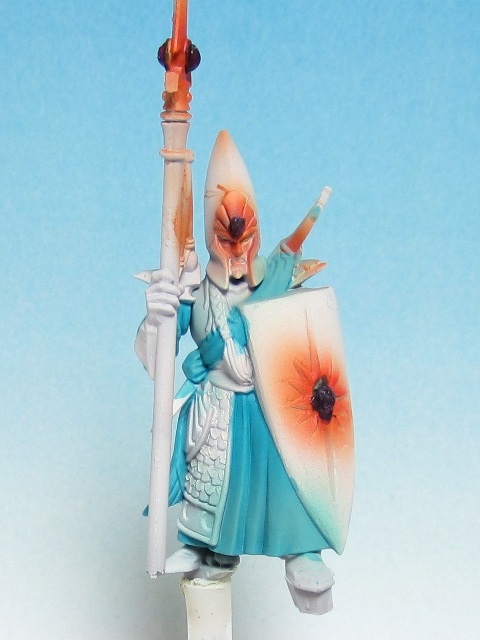
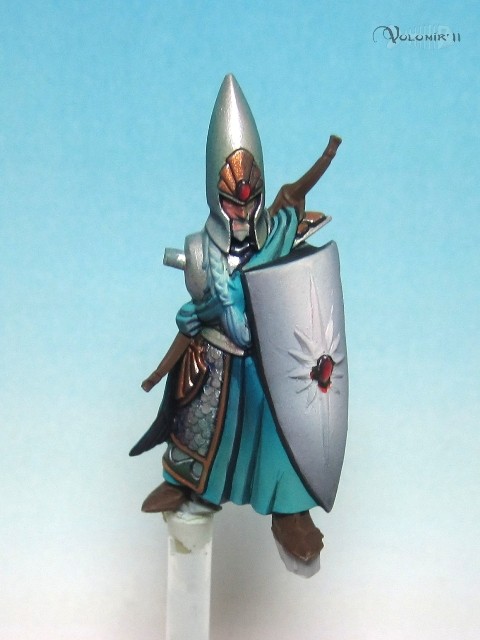
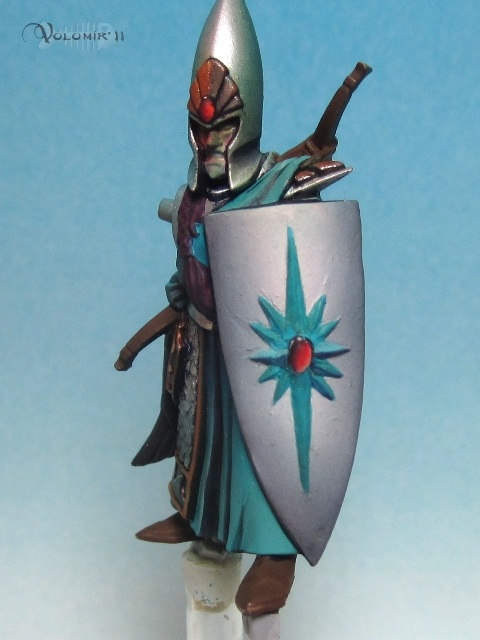
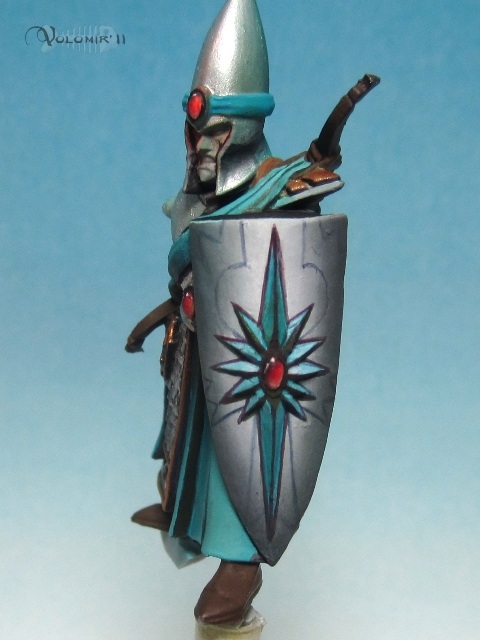
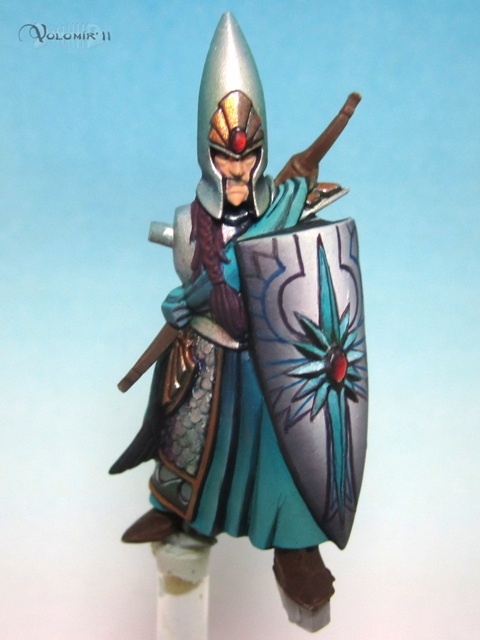
My first approach would be to get the shield concept on the actual models.
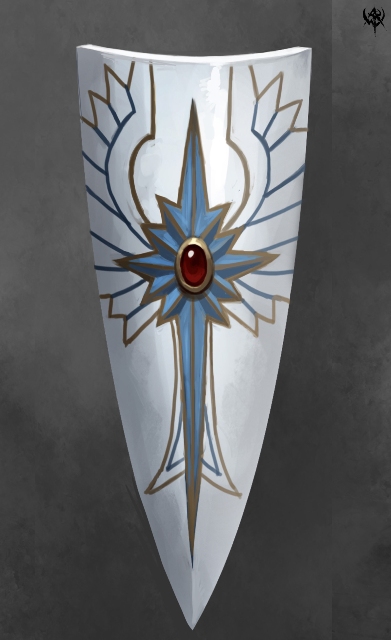
The star and the wings certainly resemble the prince from Tribute to the Fallen. Check out the lion in the background!

In this step I would leave the shield as it was now. Probably later, once I had more of the elf painted, I would come back to improve it and change stuff to get a better match for the whole painting.

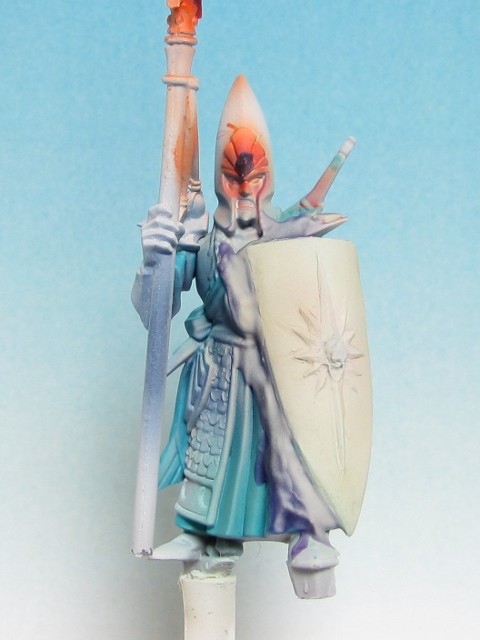
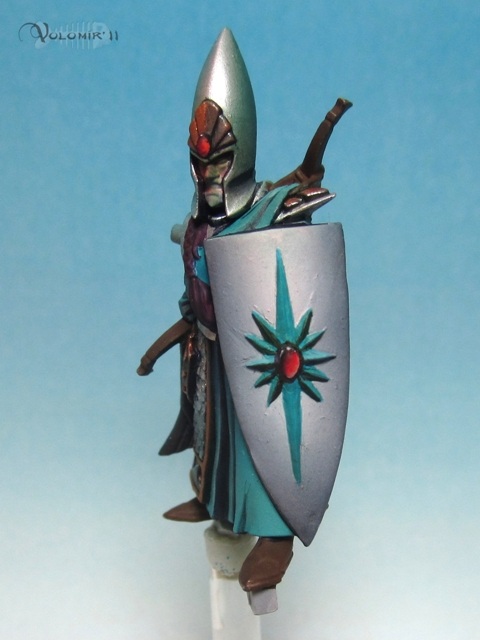
And now I would go on with the clothes and the metallic parts. I tred to use airbrush as much as I could as it would ease the painting process and also make the transitions smoother. I also did not hesitate to use metallic paint with the airbrush, it actually works more or less the same as with the other non metallic paints. The shades in the metal would be green/blue representing the reflection of the greens/blues from the clothes in the shiny elven armour.


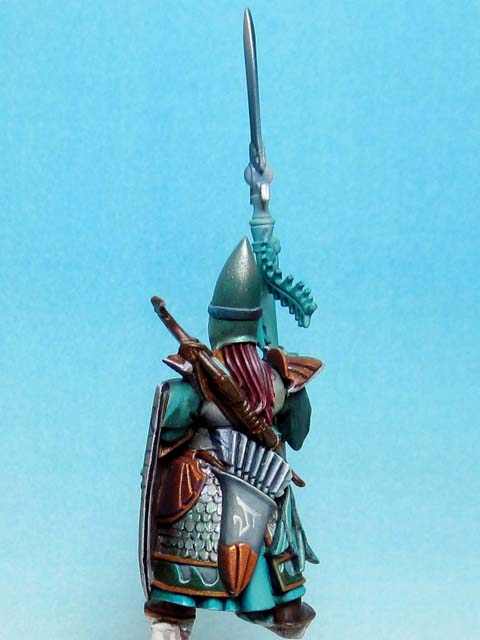
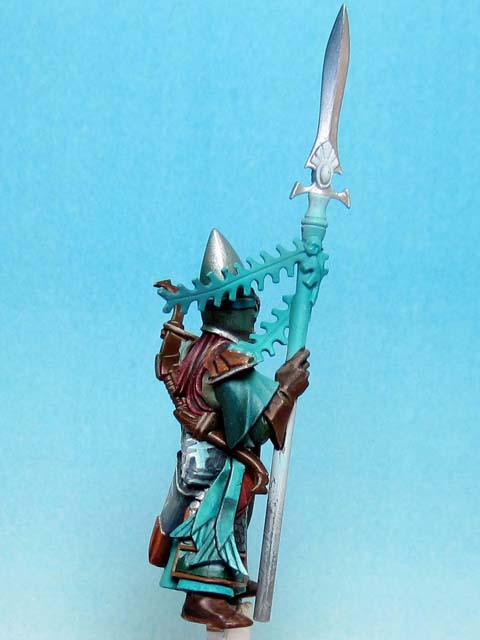
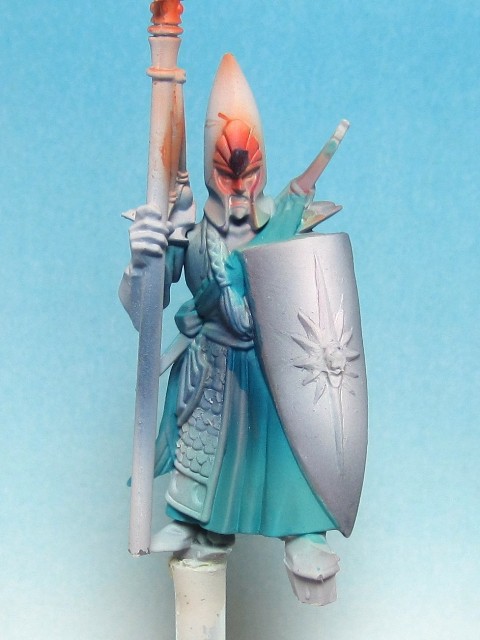
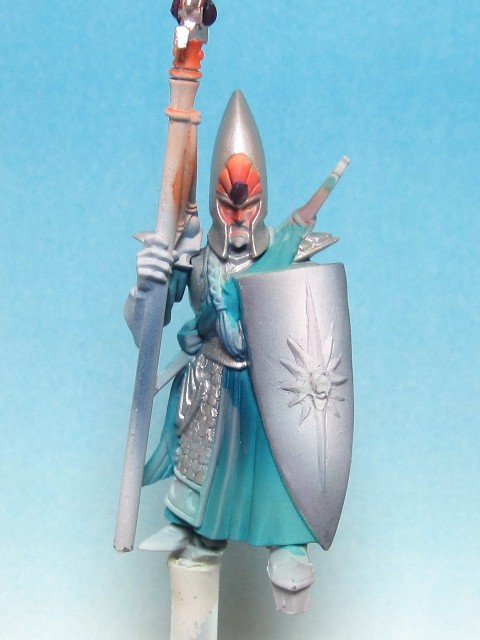
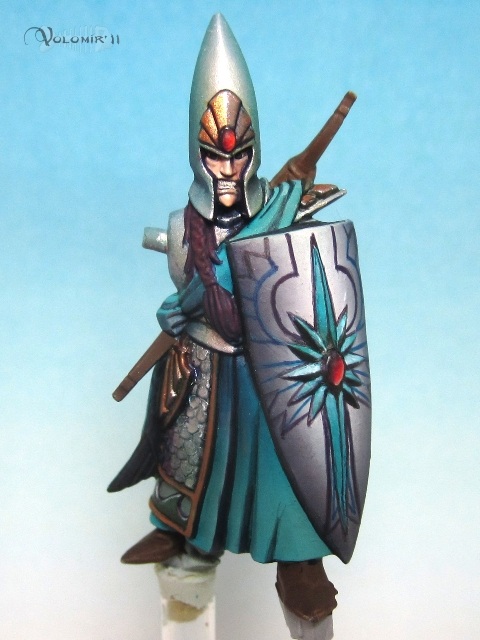
In the next step I have the prototype nearly finished. I’ve chosen a reddish tone for the hair which would contrast with the turquoise of the rest (actually, this fact gave me the idea of making all of my elves red-headed, as some kind of specific race feature for my elves). The golden parts are painted using Gold colours from Citadel, shaded with greens and purples, while the edges have fine lines of Metallic Medium from Vallejo, to emphasize gold final glows.
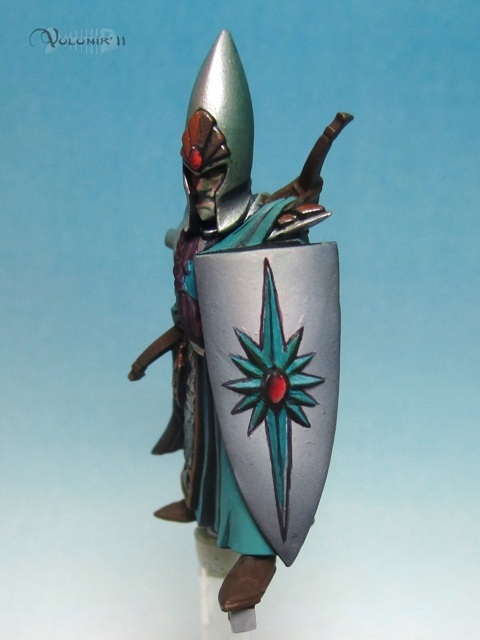
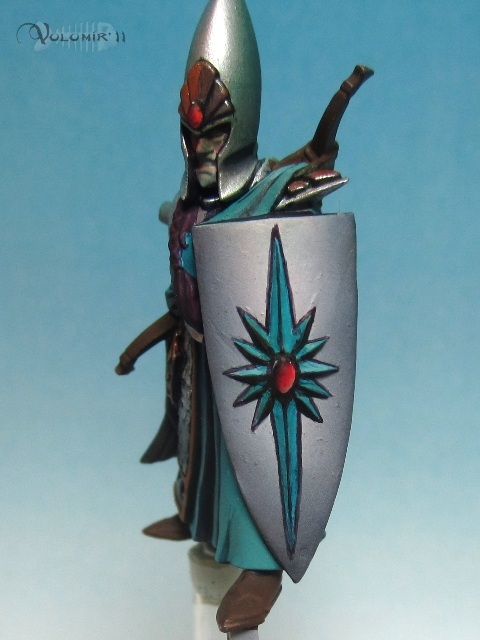
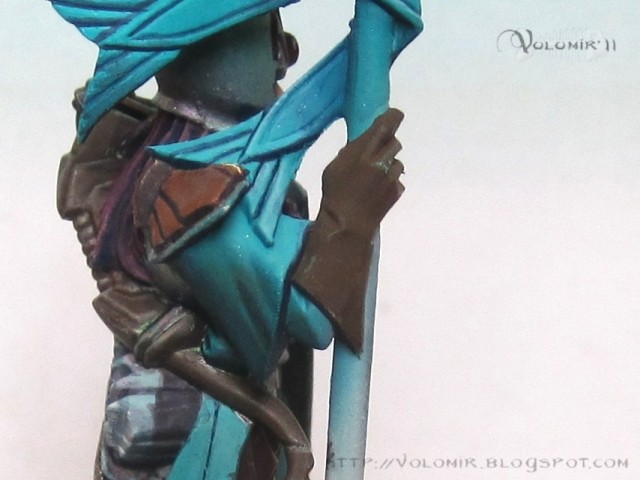
I did some work on the shield again, as I said before. Mainly, improving the contrast and perfecting the work on the wing lines. Also, here’s a start of the metallic work on the spears. Again, the use of airbrush is highly recommended. I used masking tape to cover the blade which I wasn’t painting, and I was able to get very smooth transitions.

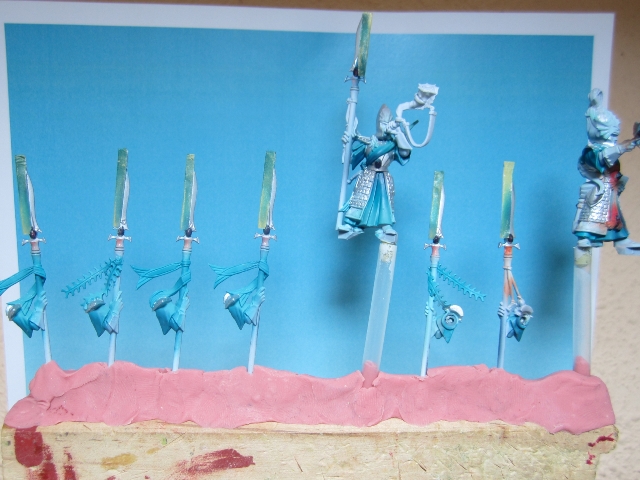
With the elf prototype finished, I was now definitely sure about the colours I would be using. Therefore, it’s time to prime the rest of the elves. Here’s a photo of some of them, where you can see the method I was using for handling the miniatures while painting: a little plastic rod attached with glue to one foot of the miniature. This came in very handy, I could use some plasticin as a temporal base, like the one you see in the photo:

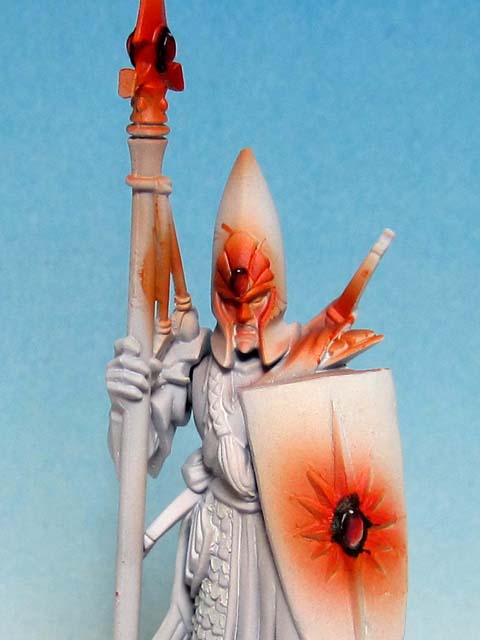
And now, the first part of the batch painting process I carefully designed (to save time). I start by painting the gems. I use airbrush to make the painting faster and smoother. At first I thought I could paint the gems entirely with airbrush and just use the normal brush for the white reflection dots, however, as the gems are so little, I could only use the airbrush for base painting and then I had to work with the normal brush.
Remember that for each step, I painted 9 elves at the same time. I put only a photo of one of them, but the rest were treated the same way.
First, orange base airbrushed (Fiery Orange, Citadel) on the gems.

You can’t really appreciate it in the photo, but in the second step I airbrushed some red (Napoleonic Red, Andrea Color) on the gems.

Then, airbrushed black (I think I used number 6 of Andrea Color’s set of blacks, but any regular black does the trick):

As you can see, the last photo does not show a very important advancement in the painting, thats because of I what I said earlier about the gems being too small. So, a little bit of regular brush painting to finish up the gems:
Alright then, gems finished. Now I mask the gems to carry on painting another part.
I painted the clothes un Turquoise, right out of the pot, with the normal brush (I could airbrush, but in this particular case, it proved to be harder than just using a normal brush.

Now I mixed some Space Wolves grey with the Turquoise, and airbrush the light parts of the clothes. It’s quite difficult to see it in the photo, but look carefully.
Add some red, blue and Dark Green from Vallejo to the base Turquoise to make the shadow colour. Airbrush again.

With the basic light and shadows done, the work left on the clothes would be done with a normal brush. Therefore, I masked the job already done and continued to another area to make good use of the airbrush.

Let’s prime the shield back to white. Notice the gem in the middle was masked earlier, so when the airbrush job is finished, we can remove the mask and find a perfectly finished gem!
The next step is painting the white/grey of the shield. First I shadowed the sides of the shield with a mixture of red and blue Andrea inks, airbrushing very very gently (to work as glazes). Also, I glazed over with a bit of dark green in the transition between the pure white and the shadow done (all the job with airbrush).

Then I gave a bit of pure white for the lights in the shield, then airbrushed again.

I finished the airbrush work in the shield, so now I could remove the masking stuff.
The rest of the work on the shields would have to be done with normal brush, so I left that for a later stage. I needed to take advantage of the use of the airbrush as much as I could so I would delay the normal brush stage until I finished all the airbrush work.
I covered by accident some parts of the robes, that was because of my lazy job at masking properly, but anyway, I repaired it with a touch of airbrush whenever I had some spare colour on the airbrush cup matching the robe’s one.
And now let’s pass on to the metallic parts. First of all I basecoated all the parts in metal, with simple Mithril Silver from Citadel. I would normally use Boltgun Metal but because I wanted the shiny look of elvish metal, I sticked to something lighter, like Mithril as the base.
Painting metal can be tricky, you need to keep transitions very smooth or else you risk losing the appearance of real metal. This means I needed to use the airbrush as much as possible, to be faster and smoother. But there are too many different metallic parts to be painted. With these elves, I had to get something in between speed and quality.
The process to follow was simple, but incredibly long and tedious. I would have to put masking tape over the blades which I was not painting each airbrush round. I had four different blades in a single spear, two on each side of the spear. Therefore, if for example I was painting the left blade of the spear, I would have to mask the right one, because the lighting there would be done the opposite way and I couldn’t risk painting it with the airbrush (which is totally inevitable because it is a very small space to paint). This means that I would have to do the airbrush painting job 4 times for each spear (because there are two sides to each spear, and two blades in each side), masking the opposite blade each time. And making a decent gradient between shiny metal light and matt metal shadow would force me to use at least 4 different mixes of colour. I would have to change colours in the airbrush for each different mix. Four colour changes in the airbrush for each blade, multiplied by 4 different blades in each spear, and by 9 elves which I still had to paint (10 in total minus the one I painted for the colour scheme) meant changing colours in the airbrush 151 times! Totally inefficient. I needed to think of a way to optimize this.
What I needed to minimize was the number of times I had to change colours in the airbrush, which for me is the most tedious job of all. Also I could reduce the number of times I needed to mask the opposite blades. If I masked front and back blades of the spear at the same time. This halved the number of times I had to use masking tape for each elf. If I used this and paint all the spears at the same time (serial painting), I could use the same mix of colour in the airbrush for all of them. The number of different mixes of colour was something I definitely could not reduce. So, with this method, I had to change colours 4 times (1 for each mix), multiplied by the number of times I had to change masking tapes, which was 2. Meaning that by painting all the blades at the same time I reduced the number of times I had to change colours in the airbrush from 151 to 8. Quite an improvement, isn’t it?
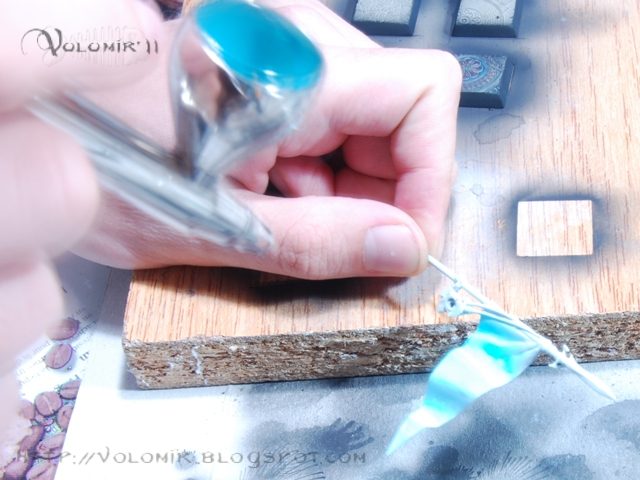
This explains why I decided to paint them serially. Beginning with the spears, I put all of them in a piece of wood so I could have them all in my hand at the same time. I masked the front and back right blades at the same time of all the spears.
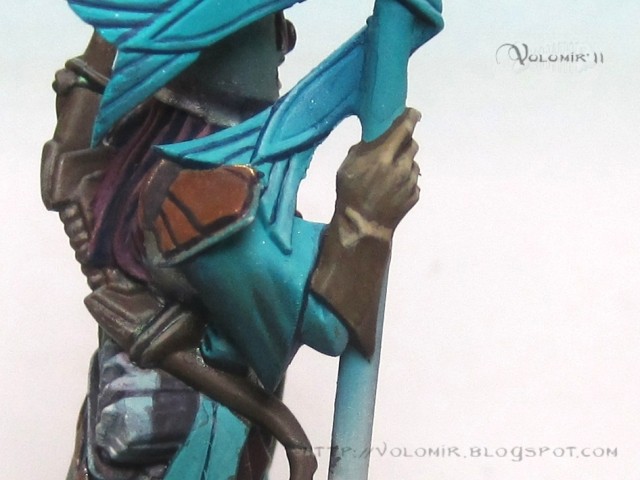
Now I airbushed with Turquoise, front and back blades of all spears.
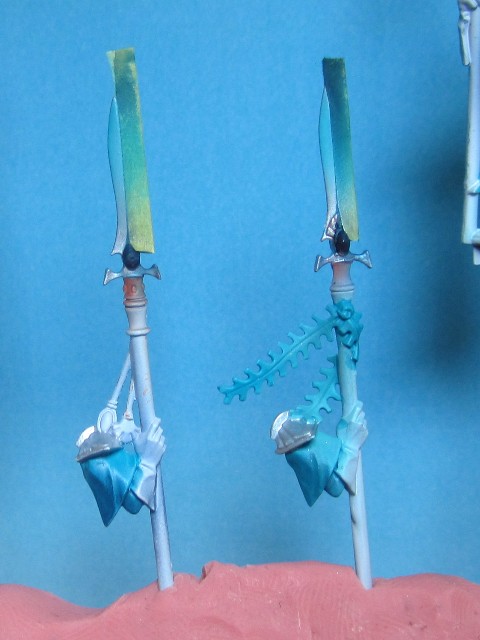
Second mix, adding Andrea Blue Ink to the Turquoise, again front and back blades of all spears.

Third mix, Andrea Blue Ink and Andrea Red Ink.
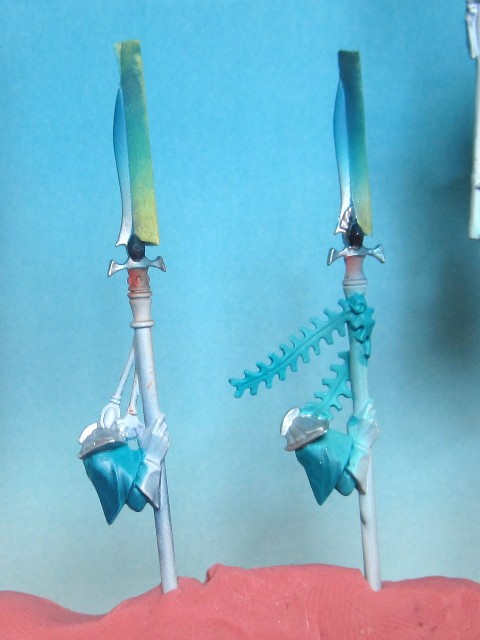
And finally, I added number 5 from the Andrea Color Black Set (some sort of black but not the darkest one) for the final shadows, once again on the front and back blades of all spears.
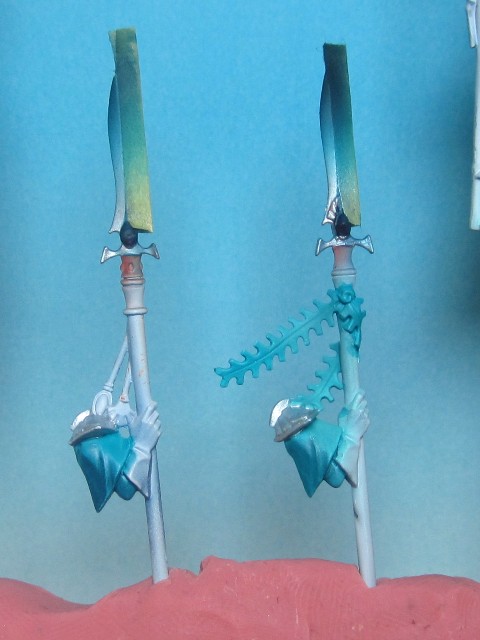
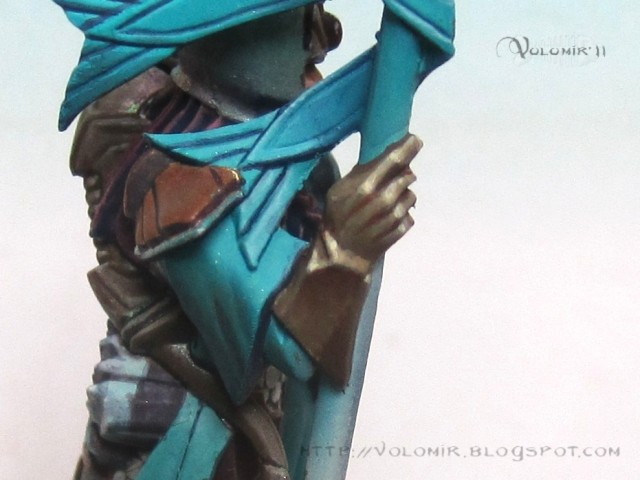
There you have it. Now I repeated the process for the opposite blades.
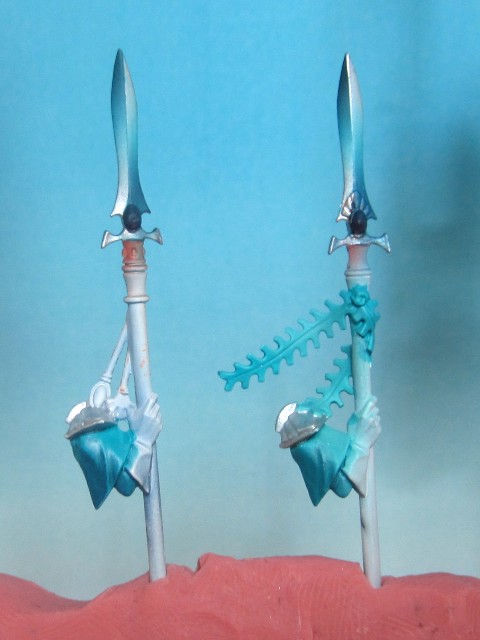
Final lights would be done with metallic medium from Vallejo, but with normal brush, so I waited to finish the airbrush work to do these.
Quite a job, isn’t it? The whole weaponry of an elf unit done in no time. I felt proud of myself!
The rest of the metallic parts followed the same routine as the one for the blades. This time I wouldn’t have to think about it as much because I wouldn’t be using any masking tape at all.
So, first, basecoat of Mithril Silver with the brush.
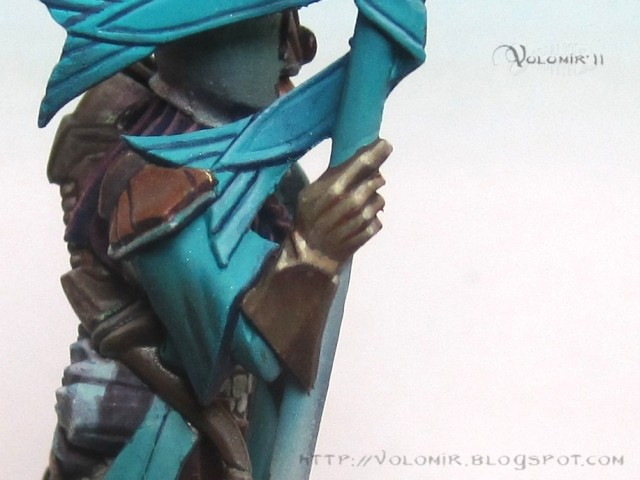
First matt shadows with Turquoise and Dark Green with the airbrush, again, glazing as gently as possible.
And now, shadows with a mix of Blue and Red Inks from Andrea, added to the previous mix.
The final shadows would be done with the brush, as these final shadow points are too small for the airbrush. The same would apply to the final light spots.
This finished the airbrush stage of the painting! Let’s get to the brush stage.
First, easy and relaxing basecoats of Chocolate Brown (Vallejo) for the wood/leather stuff and Dark Green (Vallejo) for the little green waves of the bottom of the tabard.
Followed by some more relaxed basecoating of Orange Brown to the golden parts of the miniature.
This Orange Brown serves as the basecoat for the shiny gold paint. Metallic paints cannot be compared to the usual colours we use. Metallic paints contain shiny pigments which resemble the shine effects we see in metal. Therefore, we shouldn’t use these metallic colours to paint a entire surface without using matt shadows. Metallic paint can be used to emphasize the exact points in where the metal reflects the light. So, the way I paint gold might seem a bit strange to you, but it’s an alternative approach which suits me very well. Rather than basecoating the area with pure metallic colour (as I did with the blades), I use a matt orange brown (as you would do when painting gold using the NMM technique) as the base, and then use metallic paint for the lights. Shadows are done with matt colours as well, as I did with the spears.
In the end, I cover the orange brown with the shadows. Then, why not basecoat entirely with golden metallic paint? Well, just because in my experience, matt paint with a normal brush covers much better a surface painted with another matt colour. Painting matt acrylic by brush over a previously metallic painted surface can be quite tricky. You’ll find out that paint does not adhere the same way. Therefore, a matt basecoat makes the work easier for me, and the results are the same.
So, enough said. Some highlights to the golden areas using Shining Gold from Citadel:

Now it’s time to get rid of the Maskol on the gems, and also do some shadowing to the golden shelly plates on the side of the armour.

In miniatures like this, in 28 mm scale, defining volumes is key, especially when looking at the miniatures from far away. If you define very well the shapes, painting won’t be so blurry. This is called edge highlighting. It refers to the painting of volume edges to mark the separation between them. This is done in two steps, shadow in the gaps between volumes and light on the edge of volumes. Now I am only going to do the shadow part of the edge highlighting.
So, at this point, I turned the miniature upside down and looked at it from the rear. Then paint all the areas which are normally facing down to the floor with a dark colour (never use black). I used in this case a mix between dark green from Vallejo and a bit of Red and Blue inks from Andrea. Its a very dark and saturated colour which gave me a lot of depth in the shadows. As you can see, I am only using very few colours on my palette, nearly always the same.
You see the result is a very defined miniature, maybe too much, but don’t worry, in the end the result won’t be so abrupt. I also began the painting of the clothing on the torso.
Now, some more edge highlighting on the golden metal parts (check out the shoulder pad) and I also painted the waves on the low part of the tabard. The waves are dark green with a bit of light mixing dark green with turquoise and then highlighted with space wolves grey. This is a perfect example of complete edge highlighting, shadow on the gap between volumes and then a light on the edge of the volume, which is not uniform, it is only given in the edges where the light should directly fall upon.
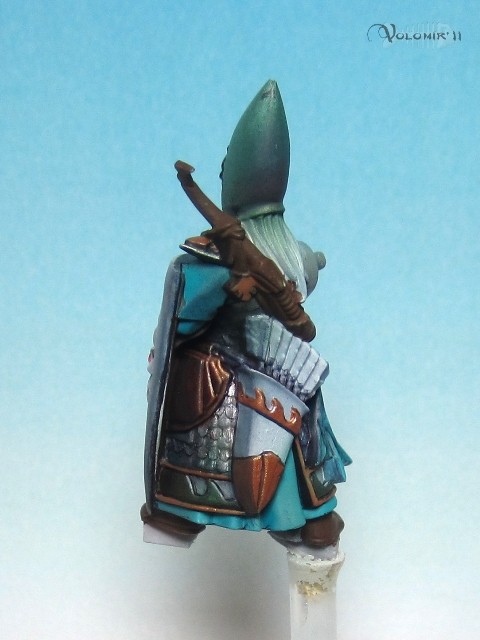
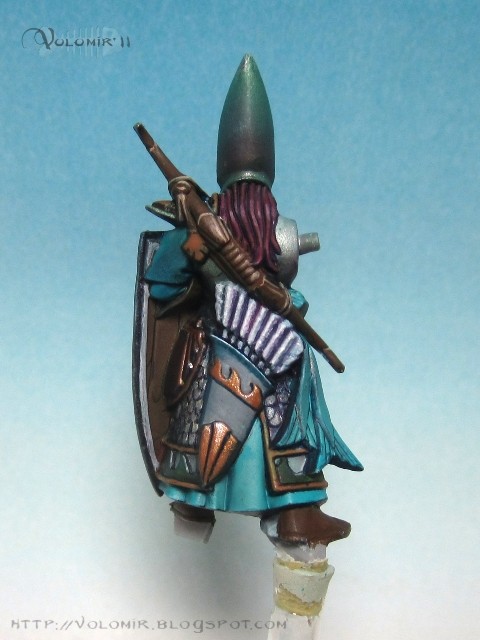
Work on the back part of the miniatures.
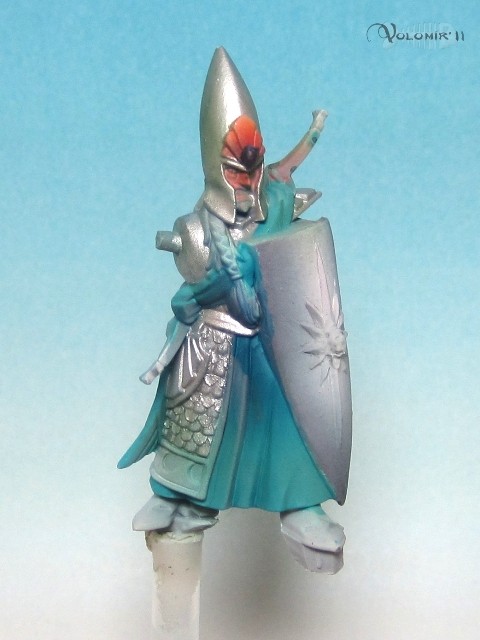
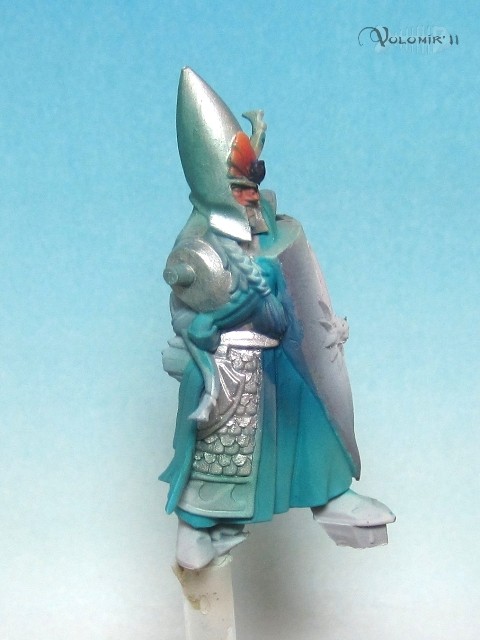
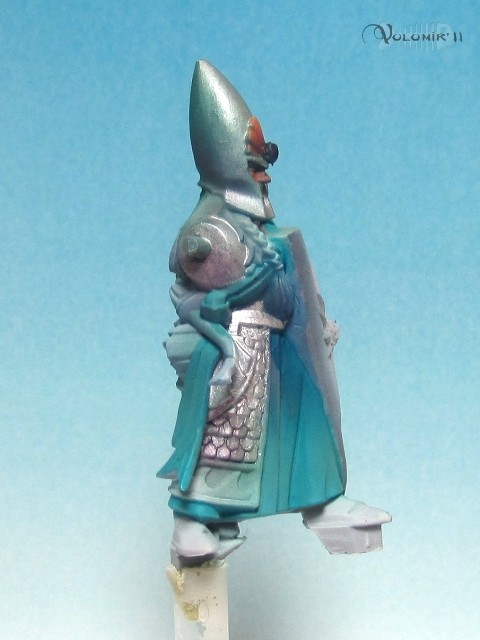
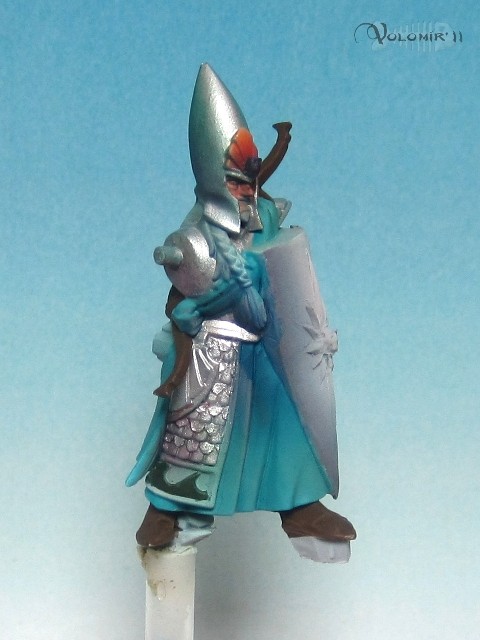
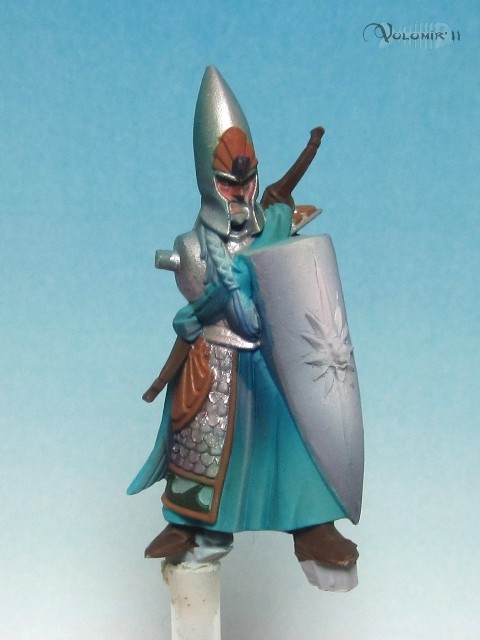
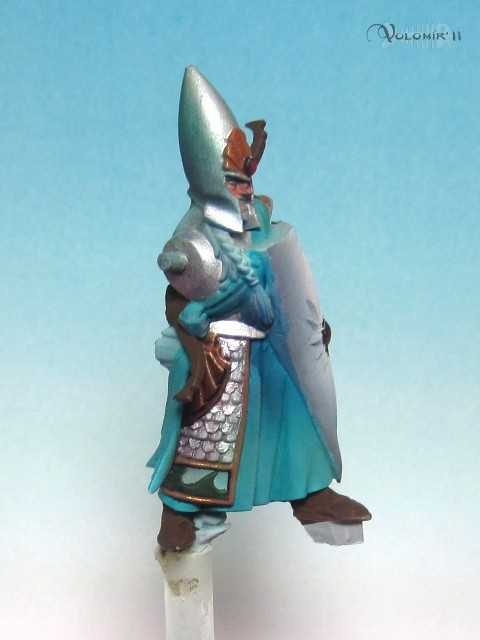
Not all the elves are the same, there are two miniatures which are different, this is, the Musician and the Captain. Here’s the Musician in the stage right before the edge highlighting:

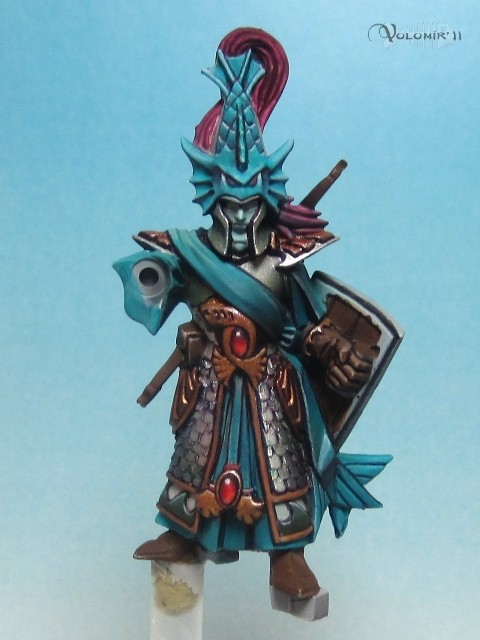
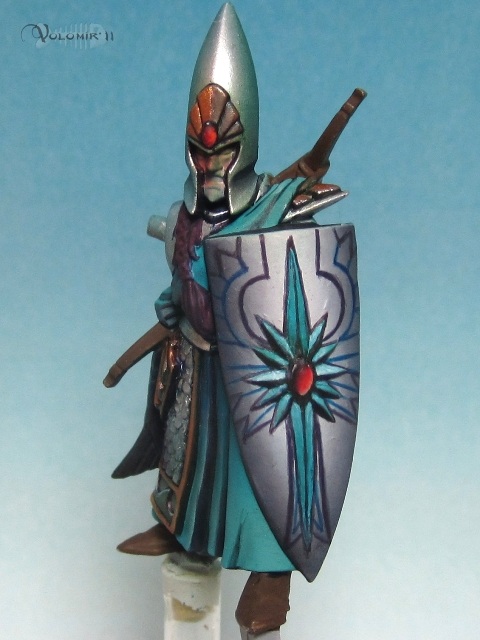
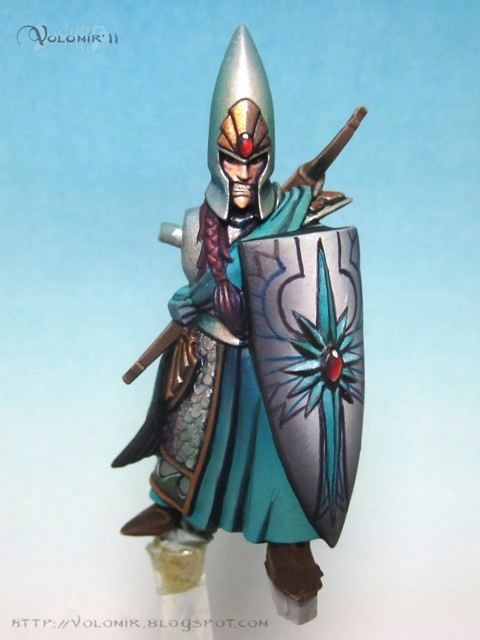
And this is the Captain, the miniature with the greatest number of details, already outlined and close to be finished. I really like the fish head on the helmet, gives him a lot of personality.
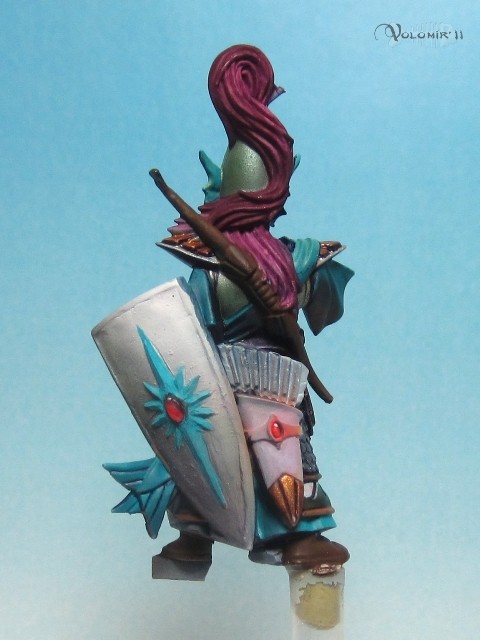
Well when I said close to be finished I meant the front part because the rear is still in progress. See the shield, where the star has just been based in turqoise (ready to begin shield work!) and the hair has been also based with the red, so I can check out the effect on the rest of the scheme.
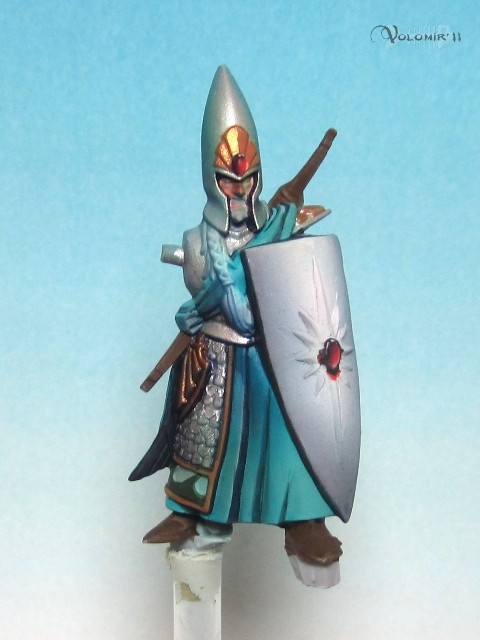
The shields were very fun to paint.
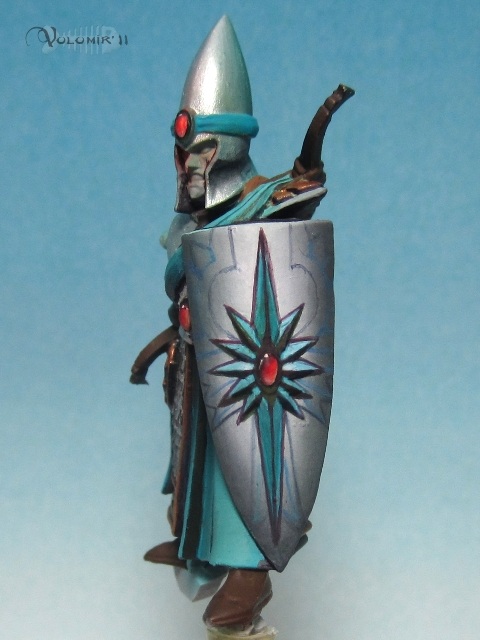
We start off with the base grey/white on the shield, so I basecoated the star in Turquoise. Notice the gem was painted previously.
Now I apply strong shadows on the lower part of the star spikes, with Dark Green and a bit of Blue Ink from Andrea.
I highlighted the whole star with a mixture of Dark Green, Red and Blue Inks from Andrea. As you can see the edge highlighting is not perfect, but that’s because the relief I did on the shields is quite irregular, so now I tried to fix this by modelling them with colours (which means creating the sensation of volumes which aren’t there by using paint).
So now I fill in the gaps of irregularities with more turquoise.
Some lighting on the star spikes which receive the more direct sunlight (basically, the spikes in the middle of the star).

So that’s all the work on the star. I pass on to the back freehand on the shield. (Notice the following photos are from another elf, thus the difference in contrast and colours). First I roughly and slightly paint the shape which will serve as a guide.
Same with the inner blue lines.
Now that I’m satisfied with the drawing, I insist on the lines I made, to make them final.
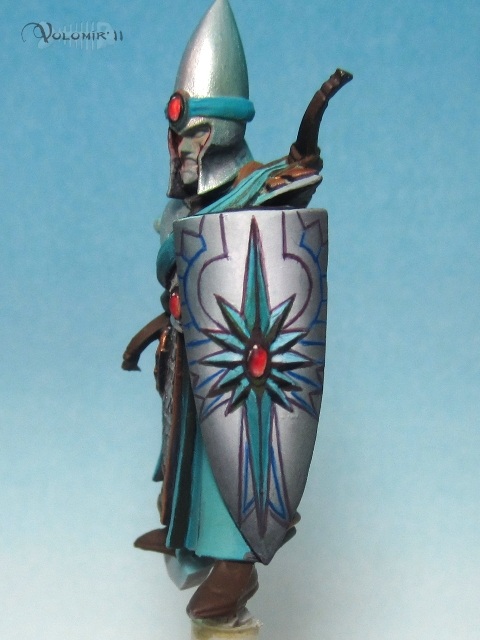
Take a look at another shield.
And that’s all on the shields. Let’s pass on to the faces.
First, basecoat of Base Skin 2 from Andrea Color Skin Set.
As this is quite a quick process I won’t show you all the steps. Just lighting using the base colour adding a bit of Ice Yellow from Vallejo, and the shadows done adding Shadow Skin 2 from Andrea Color Skin Set. Also, light spots of pure white which will give definition to the face, and details, such as teeth, using white but not pure. Mixed with Ice Yellow for example.
I decided that all the elves would have red hair, that would give them a uniformed look which would provide coherence to all the army. This feature, added to the turquoise blue which will be present in all the elves will help to get an impressive overall look.
So now I painted the hair. Hair can be tricky if you don’t know how to do it. The most important thing to take into consideration is the shiny spots. Take a look at comic book or concept art drawings. Hair is often painted plain but has very strong light points in white, because hair usually shines because of natural grease. It’s important to do that on miniature painting, or else you don’t get the hair effect you desire. The hair on these elves is not a good example, specially for the back part, because its very badly sculpted and no matter how you paint it it will always look like red spaguetti.
But notice how the braid in the front was painted. Look at the shiny spots.
Leather is also a very entertaining thing to paint. Working with textures lets you be less worried about smoothness because you paint dotting all over the surface with different colours until you are satisfied with the results. Look at this process on a glove.
First, basecoat of plain Chocolate Brown (Vallejo).
First lights with English Uniform (Vallejo).

Second lights adding a bit of Ice Yellow (Vallejo) to the English Uniform.

More Ice Yellow to the mix:
Final light points adding white to the mix.

First shadows with some brown with more red, like Number 6 from Andrea’s Flesh Paint Set.
Deeper shadow adding a but of blue.
Let’s start now with the work on the banner.
First of all, we need to have a clear thought of what the design of the freehand will be. I will create a design of my own on GIMP (freeware Photoshop) following the tutorial I wrote here
And here’s my creation for this time.
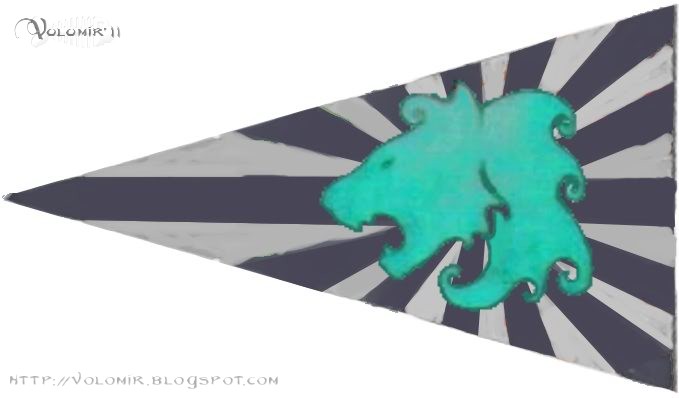

As you can see, I tried to maintain coherency with the motifs found in the prince of Tribute to the Fallen. Basically, we are talking about the star from the High Elves, the colours in the background, and the motif of the back. Its a pretty simple design.
With the design done, I printed it in the exact size of the banner.
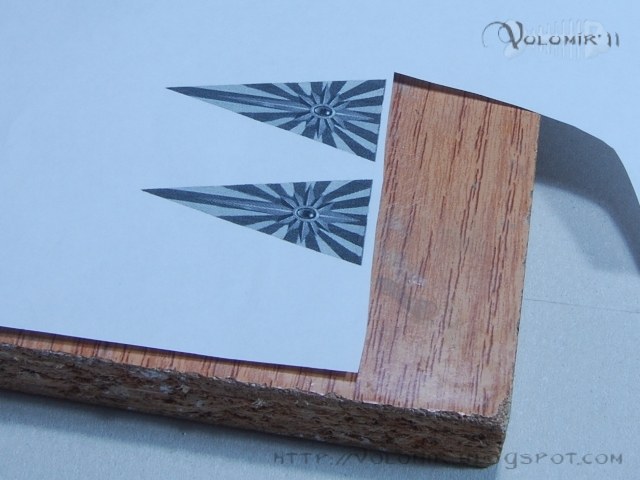
I cut and pasted the banner design to an airbrush template.

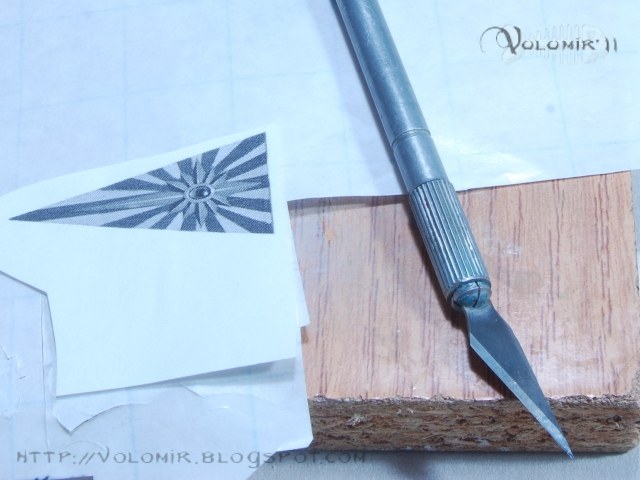
Now I needed to cut the different shapes of the design. Remember you need to divide the banner into different simple shapes which will be the ones you’ll airbrush, and all the detailing is done with a normal brush. So I divided this banner in three different areas. The first one would be the central motif, which in the front part is the whole star, and in the back part is the lion head. The second part is the area covered by blue stripes and the third part is the area covered by the grey/blue stripes.
So that’s what I did now. I cut the star shape, and also the shape of one of the colours of the stripes. The other stripes would use the colour which I airbrushed as background of the other. Take a look at the photos because the process is easier shown than explained.
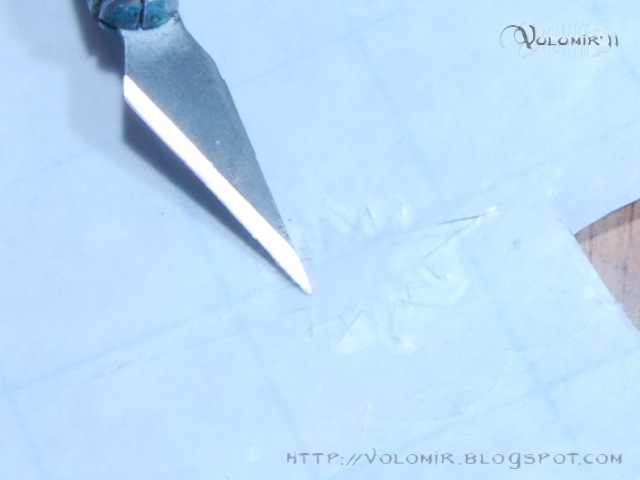
Cutting out the star from the airbrush templates.
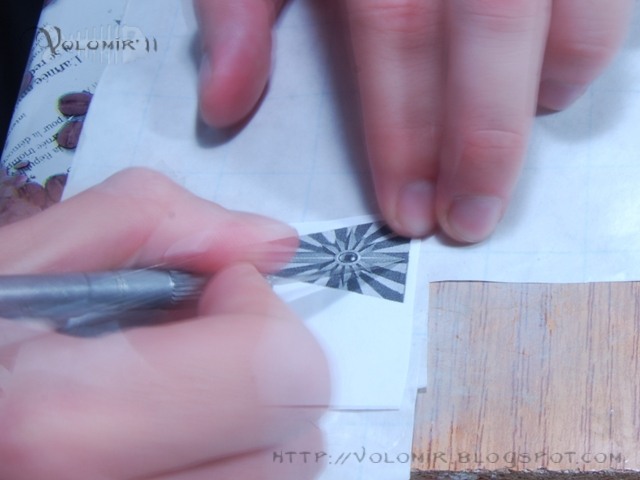

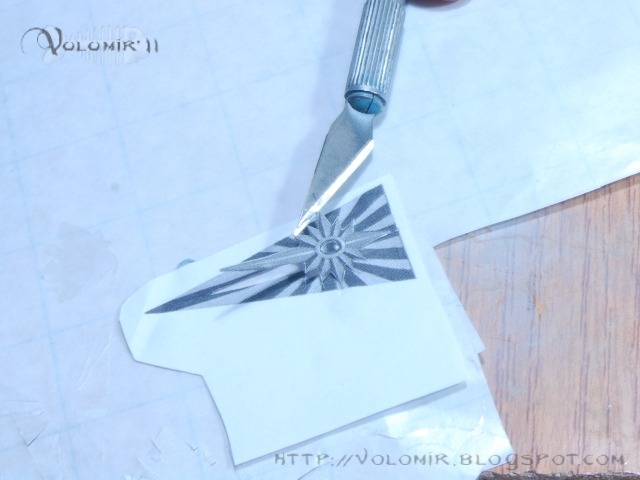
This is what we end up with, a transparent template. That’s why its difficult to appreciate it in the photo.
I needed to do the same with one of the colours of the stripes. Doesn’t matter which one of them, but take that choice into consideration when colouring the background of the stripes later. I also needed a template for the lion head.
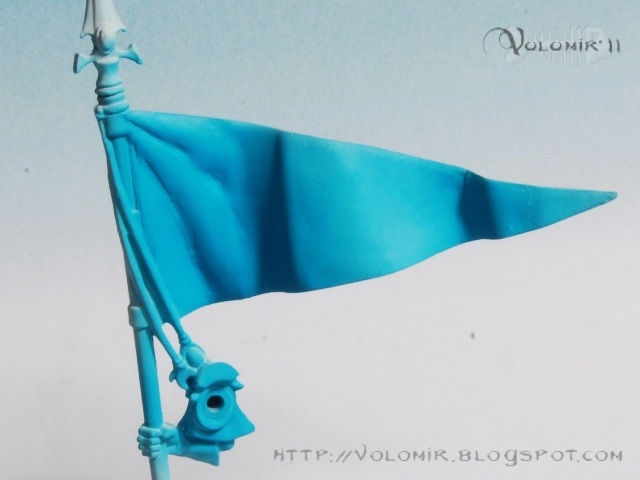
Now that I have all the templates, I primed the banner in white, Gunze Sangyo airbrushed.

Then I airbrushed the whole banner with the turquoise blue of the star and the lion head. I could have primed directly in this turquoise, but I wanted the extra resistance which Gunze Sangyo white priming gives me, and then basecoat in any other colour.
I put the template of the star on the banner.

And I airbrushed with one of the colours of the stripes. This will be the background colour of the other stripes. I previously cut out the shape of the white stripes, so that’s why I now used the other stripes colour as the background.

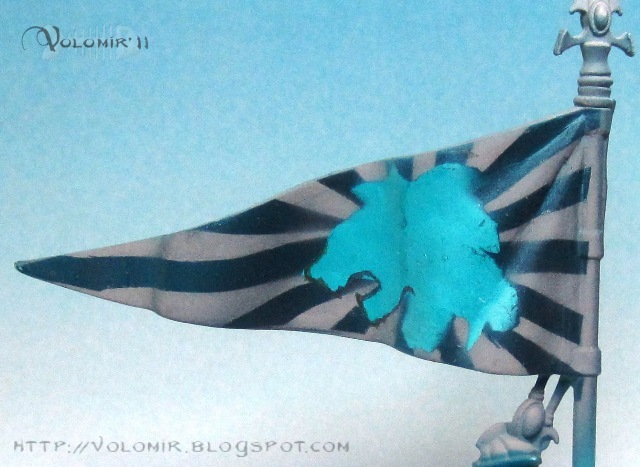
Same with the back part of the banner, but in this case, I airbrushed turquoise, then put the lion head and then airbrushed the blue of the stripes.
Now I put on the shape of the white stripes.
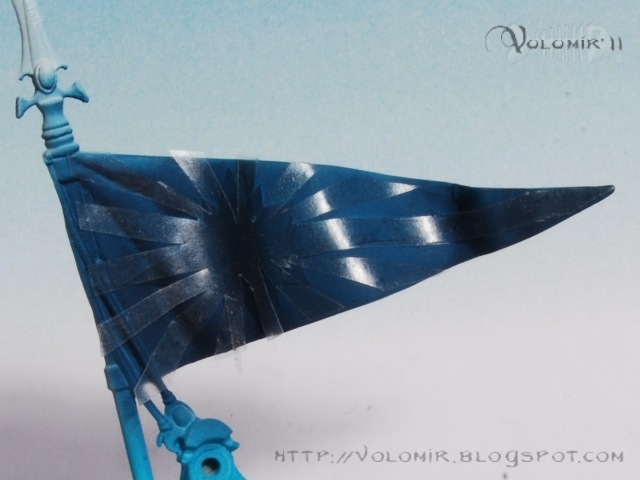
And primed in some kind of ochre, Conferedate Grey from Andrea Colour.

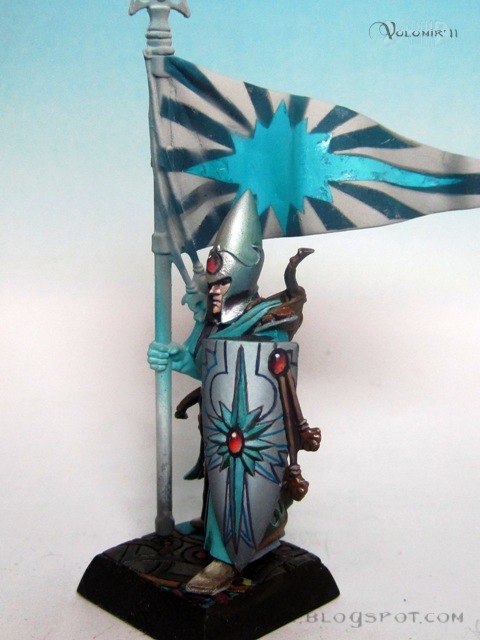
The same in the back part. And then it’s time to remove all the templates. Let’s see the overall effect on the Standard Bearer.
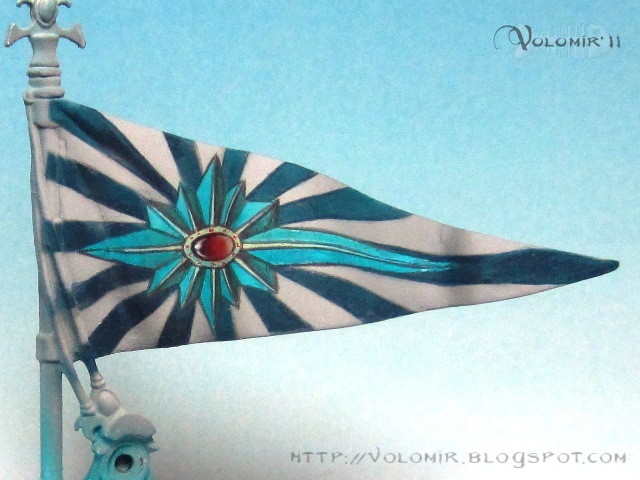
Detailing the banner! This is a much more artistic process, I can’t think of the most efficient approach in terms of time. Just have some happy painting time and enjoy. Using the freehand tecnique, I would try to make the motifs as similar as possible to the original design I made in GIMP.
First of all, I painted the gem in the center. I could have separated the gem as a different shape in red and done its painting with the airbrush. It would have probably been easier and faster but I realized it too late. Then the first shapes inside the star.

Be patient and enjoy, it’s not as difficult as it may seem, and it’s very fun! Shadows on the arms of the star, and also fixing of the stripes in some areas:
Same to the back of the banner. See the edge highlighting of the lion head in process.
And now that I have more or less the design finished, I use the airbrush to apply general shadows to all the flag, which will help maintain the ambience and give coherency to the whole banner.

Same to the back.

Finally, there are only some minor details left to be painted on the elves, such as the wood on the spears, and other stuff which I have already explained.
And so thats it! Check out the final results here.


 unveiled in Taiwan")
Good job! You’re an artist. This is simply awesome!
Gracias Juegos y Dados! 🙂
The most incredible tutorial I have ever seen! Really really really awesome! Great work and thanx for sharing!
Glad you liked it!! There’s more coming our way… 🙂
amazing tutorial 🙂
would love to see more
Thanks for commenting Richard! There will be more!! Very soon 🙂 Stay tuned!